| |
|
|
|
|
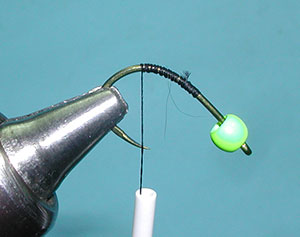
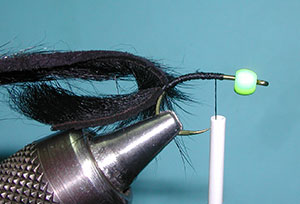
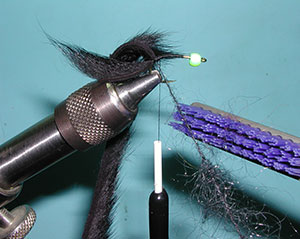
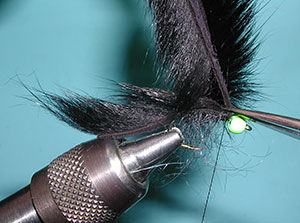
1. Slide a bead onto the hook. This is a size 10 and I am using a size 1/8" bead. Place the hook into the vise at a downward 45 degree angle so that the thread can hang from the bend of the hook to the hook point. This marks the placement of the Pine Squirrel hide.
|
 |
|
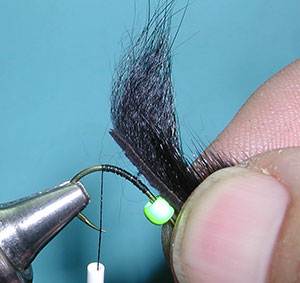
2. Measure the hide strip from the eye of the hook to the tie in position at the curve of the hook.
|
 |
|
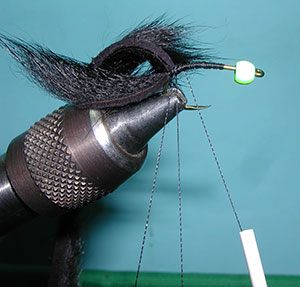
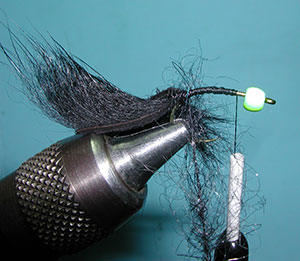
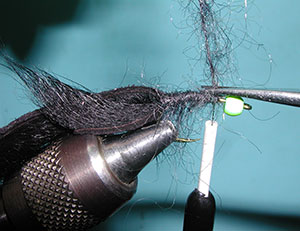
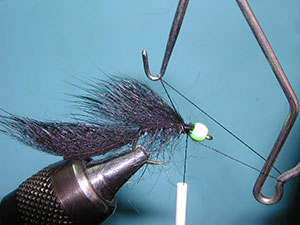
3. Attach the strip to the top of the shank at location determined in Step 1 with four tight thread wraps. Separate the fur for a clean wrap of the thread. The length that is hanging over the rear of the hook is the same that was determined in Step 2.
|
 |
|
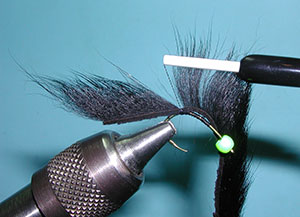
4. Bring the forward portion of the pine strip back toward the rear and tighten the anchor point of the strip with some firm thread wraps at the base of the hide.
|
 |
|
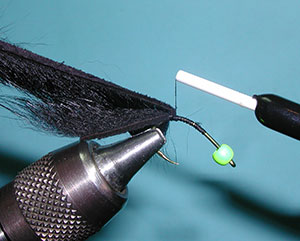
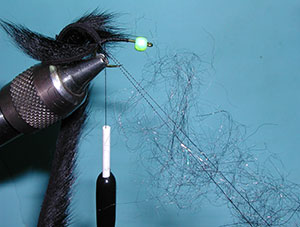
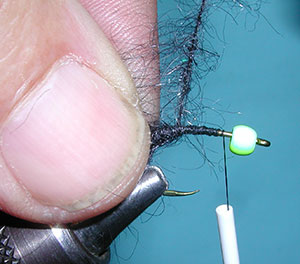
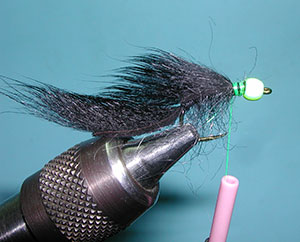
5. Reposition the hook so that the hook shank is level and wrap the thread from the tie in position to a position about one bead width behind the bead. This marks the position that the strip will be secured once the strip is pulled back over the top of the shank. |
 |
|
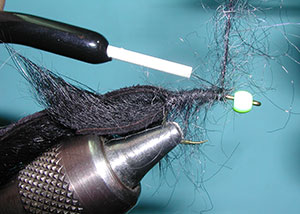
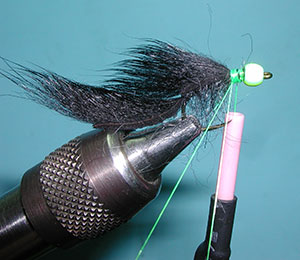
6. Wrap the thread back to the tie-in position and create a dubbing loop. Use this process:
Step-by-Step Process
- Position your tying thread.
- Pull down to expose about 4-5 inches of thread.
- Loop thread around the index finger of your left hand.
- Take a full wrap around the hook shank and then pass the thread around the loop.
- Place a dubbing spinner tool at the base of the loop.
- Feed the loop with a small portions of dubbing. Spread dubbing evenly within the upper portion of the loop.
- Pinch the loop at the base of the dubbing material and spin the tool clockwise, releasing your pinch as the dubbing is spun nicely.
- Clamp Hackle Pliers to the loop where you pinched and remove the dubbing spinner tool.
- Use the hackle pliers to wrap the dubbed brush over the shank.
- Secure the brush with thread wraps and snip off the excess.
|
 |
|
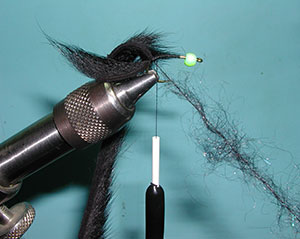
7. Less is more... Dubbing loops are used to create a dubbing brush with fine fibers extending from the twisted thread. Apply the dubbing thinly and spread out evenly. |
 |
|
8. As the thread is twisted fibers are locked between the thread with fibers also extending beyond the thread core.
|
 |
|
9. A dubbing brush will unlock some of the trapped fibers and extend the fibers from the thread core. |
 |
|
10. Start the dubbed thread loop around the shank at the tie-down position. Use your fingers to preen back the fibers for the next wrap. |
 |
|
11. Each wrap should be touching the previous but not overlapping. |
 |
|
12. Wrap up to the position that was determined when you made the thread foundation. This is about one bead width behind the bead. Secure with a couple of thread wraps.
|
 |
|
13. Trim off the tag end and secure with a few more thread wraps.
|
 |
|
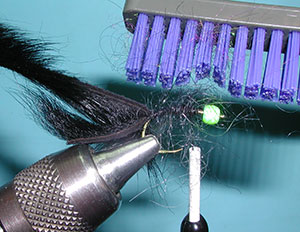
14. Use a dubbing brush to work the fibers forward and unlocking any trapped fibers. Once you brush forward, divide the fibers in half and brush downwards on both sides of the shank. |
 |
|
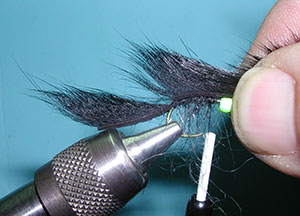
15. Bring the Pine Squirrel strip forward over the top of the hook shank. |
 |
|
16. Secure the strip at the location you stopped the dubbing. Split the hair so that you have a clean area of the hide to secure to the hook shank. |
 |
|
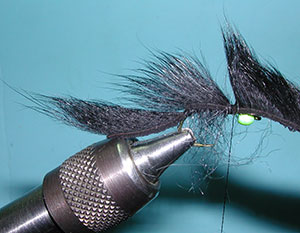
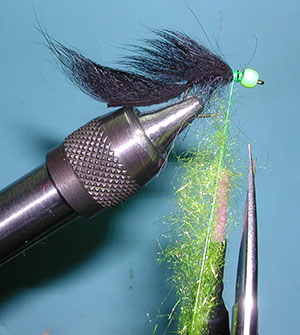
17. Trim off the hide strip behind the bead. The trim leave a small area behind the bead to allow for a tie-off area for the collar. |
 |
|
18. Secure the hide strip with thread wraps and whip finish. Trim off the thread.
|
 |
|
19. A new thread is attached matching the coloration of the collar. |
 |
|
20. Create a second dubbing loop. |
 |
|
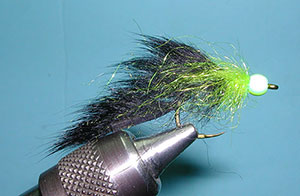
21. Apply the collar dubbing evenly within the loop and trim the material so that about 1/4 inch of dubbing extends from both side of the thread core. Spin the loop and wrap the collar up to the bead. There will be a small notch behind the bead which will allow you to secure the thread collar and whip finish. |
 |
|
22. The collar fibers are brushed forward, then backward, giving a full burst of color to the front of the leech and providing an attraction to the trout. |
 |