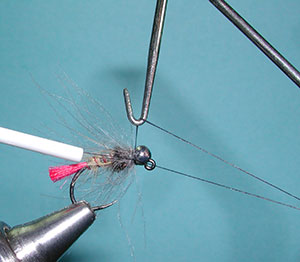
2. Attach the thread behind the bead and lock the bead into position behind the eye with thread wraps. Lay a thread foundation to the bend of the hook and bring the thread back to the mid point of the shank.

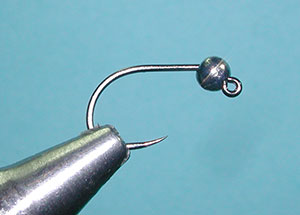
| 1. Slide a slotted tungsten bead (small round opening first) onto the hook. Place in the vice and slide the bead forward up against the hook eye. Twist the bead as necessary so the rounded end of the slot is at the top of the hook shank. |
|
|
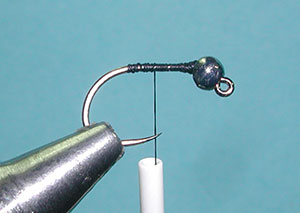
2. Attach the thread behind the bead and lock the bead into position behind the eye with thread wraps. Lay a thread foundation to the bend of the hook and bring the thread back to the mid point of the shank. |
|
|
|
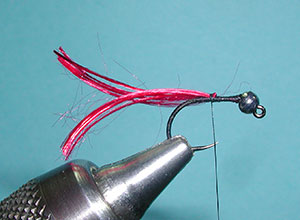
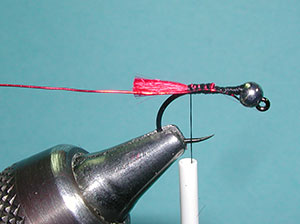
3. Clip a piece of 4-strand Danville Floss from the spool and place the center of the floss on the thread. Wrap the thread around the shank, locking the floss to the top of the hook shank. |
|
|
| 4. Keep the floss ends even and wrap the thread securing the floss to the bend of the hook. Clip off the tag ends of the floss. The end of the tag should be just beyond the end of the hook. This is subjective, you can have shorter tag or a longer one. |
|
|
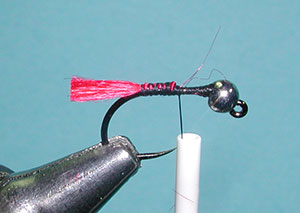
| 5. Attach a red wire to the bottom of the hook shank secureing the wire from behind the bead to the bend of the hook. | |
|
|
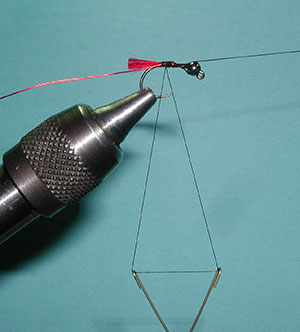
6. Create a dubbing loop at the bend of the hook. |
|
|
|
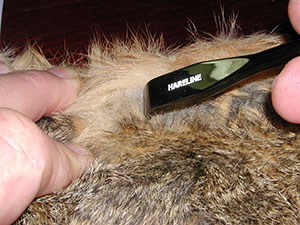
7. Remove some Red Fox fur for dubbing. I'm using a Hareline Ceramic Zirconia Dubbing Rake to get the proper blend of underfur and guard hairs. |
|
|
|
8. Place the dubbing inside the dubbing loop and spin. I'm using a Stonfo Rotodubbing Twister which quickly creates a spikey dubbed thread segment that I can wrap up to just behind the bead and tie off with thread wraps. Clip off the tag end of the dubbed segment and secure with thread wraps. |
|
|
|
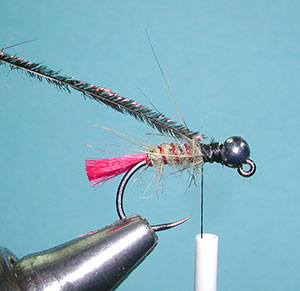
9. Wrap the wire ribbing forward with about four spirol wraps to the thorax area and secure with thread wraps. Break off the tag end of the wire with a "helicopter" motion and secure with some additional thread wraps. Wrap the thread behind the bead for a thorax region. |
|
|
|
10. Attach a strand of peacock herl by the tip on the thorax area securing the herl to the top of the hook shank behind the bead.. |
|
|
|
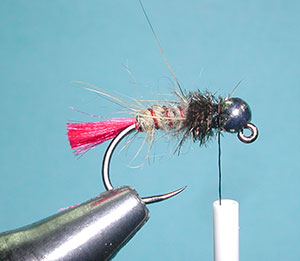
11. Wrap a thorax with the herl, 4-5 turns should do it. Secure the herl just behind the bead with thread wraps and trim off the tag ends. |
|
|
|
12. Select a long CDC plume feather and attach the feather by the tip just behind the bead. Once secured, trim off the CDC fibers that extend from the end of the tip. |
|
|
|
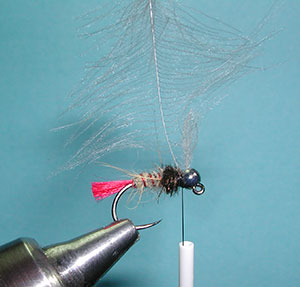
13. Holding the quill of the CDC feather, preen back the fibers with your thumb and index finger as you wrap the quill around the back of the bead. On the last turn of the feather, secure with 2 tight thread wraps and trim off the tag end. |
|
|
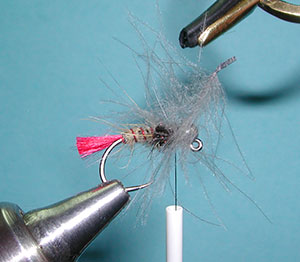
| 14. Whip Finish. |
|
|
|
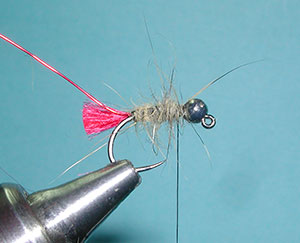
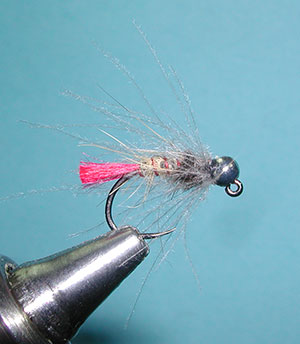
15. The finished CDC Red Tag. |
|
|
©2023 Steve Schalla
This page is not to be copied without
my explicit permission.