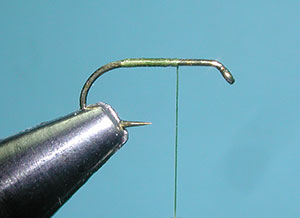
| 1. Attach the thread and wrap a foundation from the 70% position on the shank to the bend of the hook. Wrap back to the 70% position. |
|
|
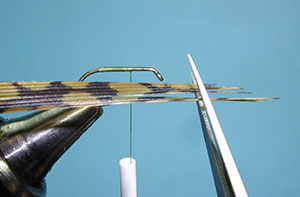
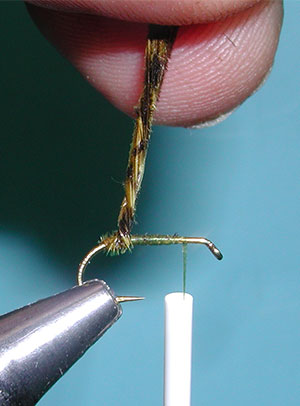
| 2. Snip a segment of Golden Pheasant tail fibers from the center of the tail and cut off the tips to square them up. |
|
|
| 3.
Place the tips at the 70% position and secure with thread wraps. Secure the fibers to the top of the hook shank down to the bend of the hook. |
|
|
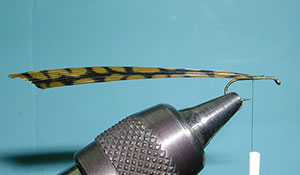
| 4. Return the thread back to the 75% position on the hook shank. |
|
|
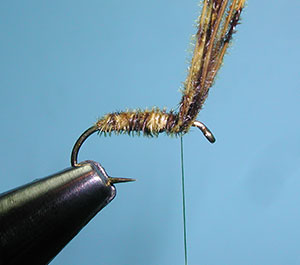
| 5.
Twist the fibers into a cord and wraps the fibers with connecting wraps to the 75% position on the shank. With each turn of the wrap you can give an additional twist to keep the same tension. |
|
|
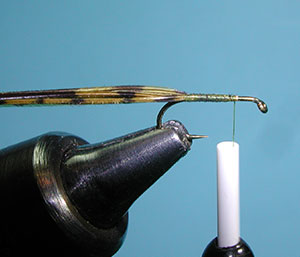
| 6. Wrap up to the 75% position and secure with a could of thread wraps. | |
|
| 7.
Trim off the tag end of the fibers and secure with some additional thread wraps. |
|
|
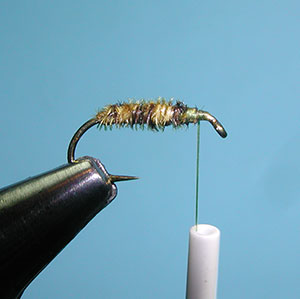
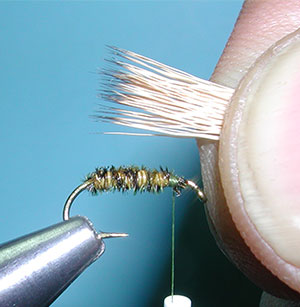
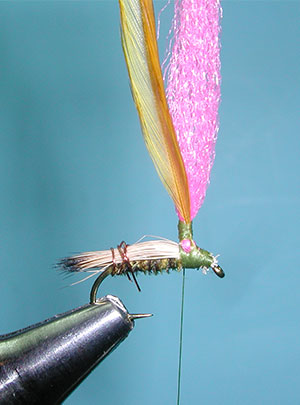
| 8. Clip off a clump of Yearling Elk Hair. Comb out the underfur and sert the clump into a hair stacker. Tap the stacker numerous times and check to see that the tips are even. | |
|
| 9. Measure the hair so that the length is about the same as the hook shank. Bring the clump to just in front of the body at the top of the hook shank. The tips of the Elk Hair should be just beyond the bend of the hook. | |
|
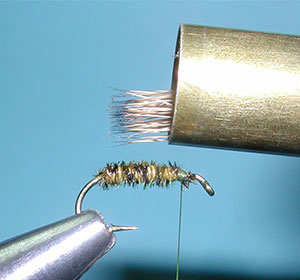
| 10. Holding the hair with your thumb and index finger at the tie in position, place two wraps of thread around the clump using your thumb and finger to guide the thread into the position. Tighten the thread and place two more tight wraps to the bundle. Still holding the wing, place some more tight wraps to secure the fibers to the shank behind the eye. | |
|
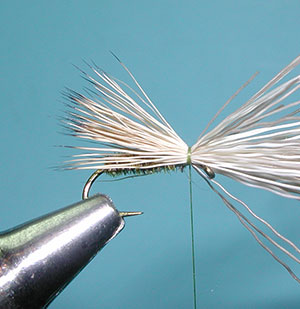
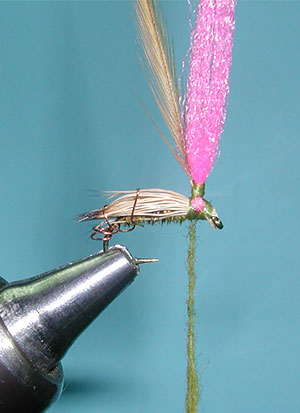
| 11.
Lift up the tag ends of the Elk Hair behind the eye and snip these end off with scissors using a slanted cut. |
|
|
| 12. Secure the butts of the hair with tight thread wraps behind the eye of the hook. You can apply some looser wraps just behind the tie-in position to reduce the flare of the fibers. |
|
|
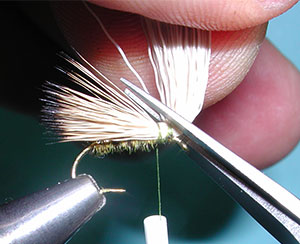
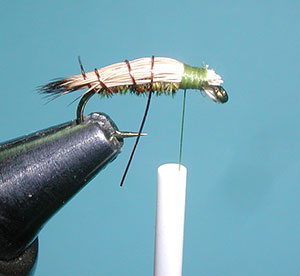
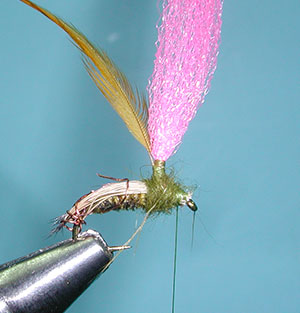
| 13.
A piece of wire will help keep the wing material from interfering with the construction of the wing post and parachute hackle. Move the thread to the midpoint of the thorax section. |
|
|
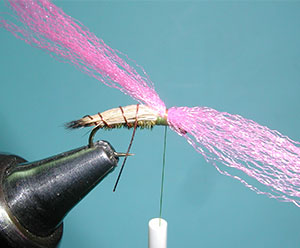
| 14.
Tie in about a half strand of McFlylon with two diagonal turns of thread. |
|
|
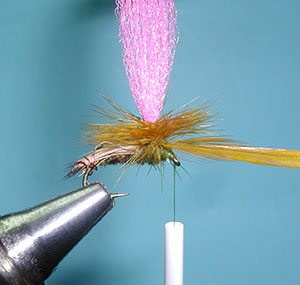
| 15.
Turn the McFlylon so it is perpendicular to the shank and make two more diagonal wraps across it's center. Add some more X-wraps to the McFlylon stacking each wrap on top of the other. |
|
|
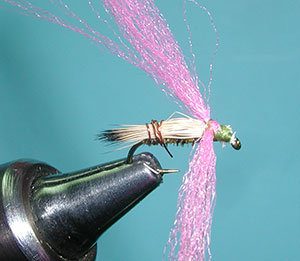
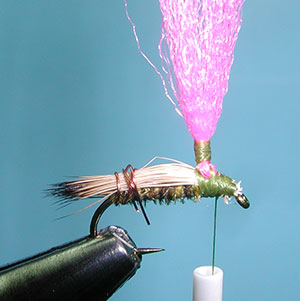
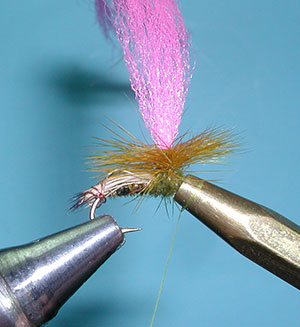
| 16. Pull both halves of the McFlylon up above the hook and make a post wrap around the base, grouping the McFlylon into one piece. The post should be just long enough to allow the hackle to wraps 4-5 turns. | |
|
| 17.
Select a saddle hackle and remove the lower fibers for a bare stem. Place the bare stem in front of the post and behind the eye, securing the stem to the hook shank with tight wraps. Then, wraps the bare stem against the post with thread wraps going to the top of thread base you constructed earlier. You should have a small section of bare stem above this thread base so that it does not catch fibers once you wrap the hackle around the post. |
|
|
| 18. Apply some dubbing to the thread. | |
|
| 19. Wrap the dubbing around both sides of the post, covering the thorax region. | |
|
| 20. Wrap the hackle feather from the top of the post to the bottom, 4-5 turns. Secure the tag end of the hackle by placing 3 thread wraps at the base of the post between the hackle fibers and tag end of the hackle. Wrap the thread around the base of the hook eye and apply a whip finish. | |
|
| 21. Trim off the tag end of the hackle and apply a couple of half hitches. Apply some head cement behind the eye of the hook. |
|
|
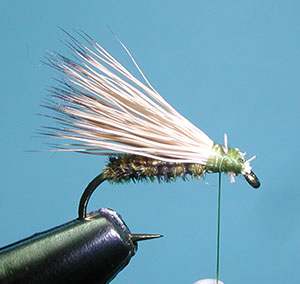
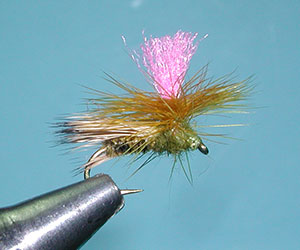
| 22. Remove the wire holding down the wing and trim the wing post to the height you prefer. The Finished Bloom's Parachute Caddis. | |
|
©2023 Steve Schalla
This page is not to be copied without
my explicit permission.