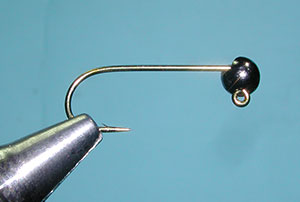
| 1.
Slip on a slotted tungsten black bead. Using a 5/32 size with a #8 Daiichi 4660 jig hook. Oh! and crimp down the barb. |
|
|
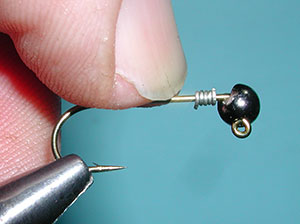
| 2.
Wrap 0.015" Leadfree wire around the hook shank 4-5 times and shove it into the bead cavity to stabilize the bead. |
|
|
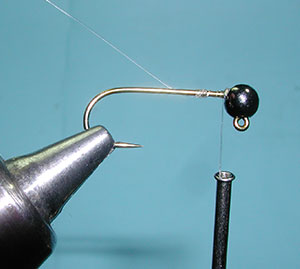
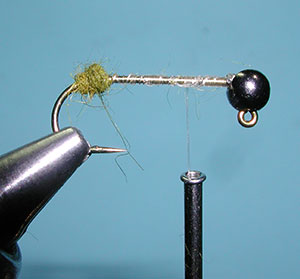
| 3.
Attach the Monofilament thread just behind the bead and secure the wire wraps. Notice the barbs are crimped down. |
|
|
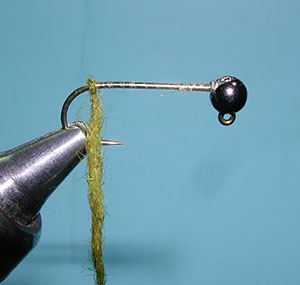
| 4.
Wrap the monofilament thread to the bend of the hook and apply Aussie Dubbing to the thread. I apply one wrap to lock in the material to the shank and can tighten the dubbing around the thread. |
|
|
| 5.
Wrap a small ball of dubbing at the bend of the hook. This performs as a stop for the squirrel zonker strip you will apply later. Bring the monofilament thread up to the 1/3 position on the hook shank behind the bead. The is the location you will tie in the legs (or pectoral fins). |
|
|
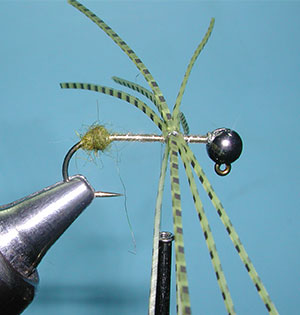
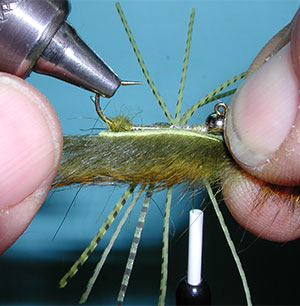
| 6.
Clip off 5 barred legs, 1.5 to 2.0 inches long, and secure the center of the bundle of legs at the tie in position on top of the shank, 1/3 shank length behind the bead. Apply some X wraps. |
|
|
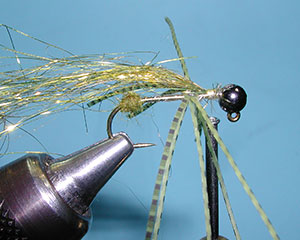
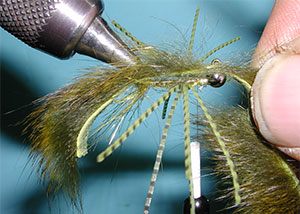
| 7.
Bring the thread to just behind the bead and attach a section of Ice Wing Fiber just behind the bead. |
|
|
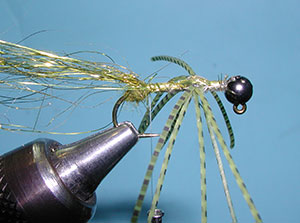
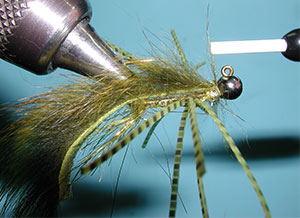
| 8. Secure the fiber bundle along the top of the shank with thread wraps down to the dubbing ball at the bend of the hook. The monofilament allows the coloration to shine through. This is the reason for using monofilament. | |
|
| 9. Trim the tag end of the fiber bundle about one hook shank from the bend of the hook. Cut the material with some sawing motions of the scissors so that there is some taper. | |
|
| 10. Wrap the monofilament thread back up to behind the bead. | |
|
| 11.
Whip Finish and cut off the tag end of the monofilament. |
|
|
| 12.
Attach the Olive Dun thread to just behind the bead. |
|
|
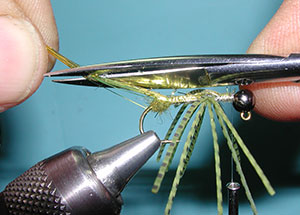
| 13.
Invert the hook and measure a strip of pine squirrel so that the attachment location is about one hook shank long. Marking that spot with your right thumb and index finger, attach the strip to the point of the hook. |
|
|
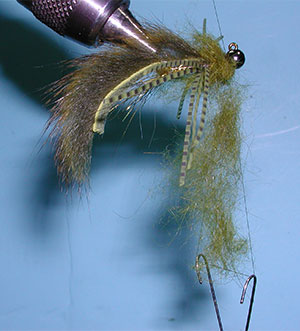
| 14.
Remove the hook from the vise so that you can slip the strip from the hook point, around the bend, and up to the dubbing ball. Reattach the hook in the inverted position and bring the front part of the strip up to the bead. |
|
|
| 15.
Secure the strip with thread wraps just behind the bead. Cut off the tag end and secure with additional thread wraps. |
|
|
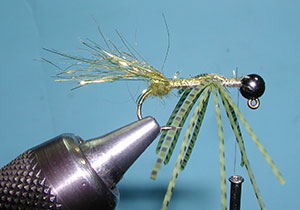
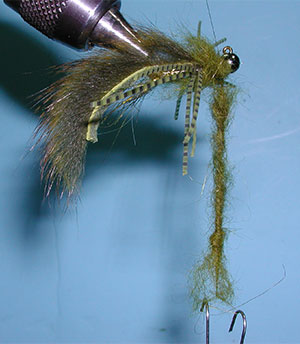
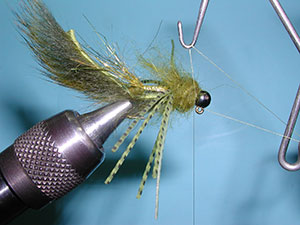
| 16.
Attach a small wad of dubbing to both the top and bottom of the hook shank behind the bead. This material helps to hide the thread wraps that secure the strip but also provides additonal material to construct the sculpin head. |
|
|
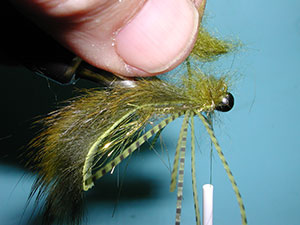
| 17.
This photo shows how the material is clumped on both sides of the hook shank. |
|
|
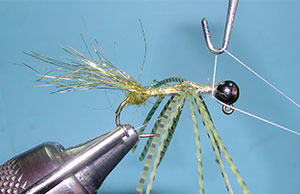
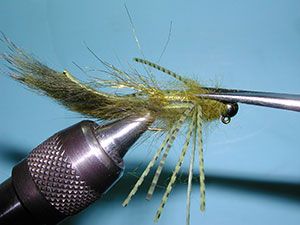
| 18. Create a dubbing loop and apply Aussie Dubbing to the loop. | |
|
| 19. Twist the loop to create a dense chenille of dubbing. | |
|
| 20. Wrap the dubbing around the shank just behind the bead. This should be fairly dense. Secure with thread wraps and trim off the tag end. | |
|
| 21.
Whip Finish and trim off the tag end of the thread. |
|
|
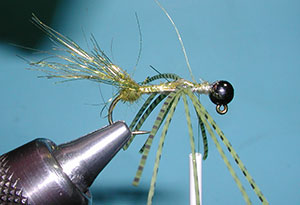
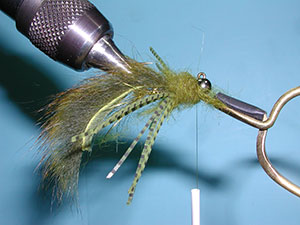
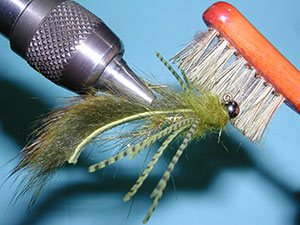
| 22.
The head dubbing that is on the "belly" side of the pattern should be trimmed so that more of the shiny belly material shows itself. |
|
|
| 23. Brush out the head to get a nice flow of material going rearwards. | |
|
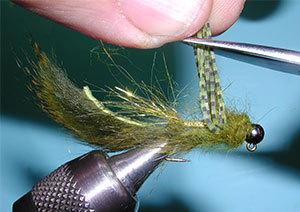
| 24. Grab the end of the silicon legs and trim so that they are about the length of the hook shank. These legs should extend perpendicular from the shank and not be pushed rearwards by the head dubbing. | |
|
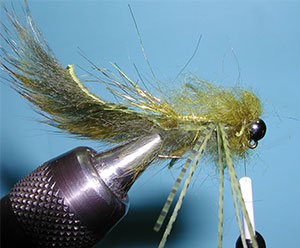
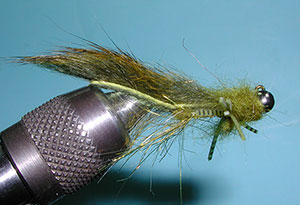
| 25. The finished Mini Sculpin. Designed to bounce off the bottom with the hook point being upright to reduce snags. The entire fly is only about 1.5 inches long, very close to many natural sculpins found in Sierran waters. | |
©2023 Steve Schalla
This page is not to be copied without
my explicit permission.