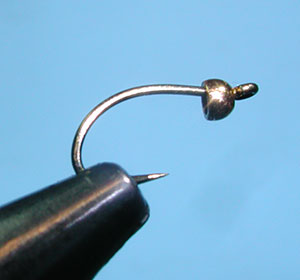

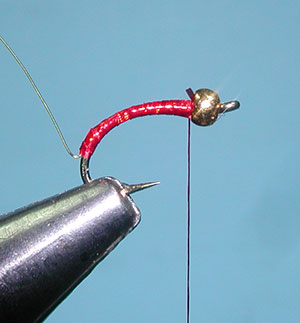
| 1. Attach the bead to the hook and onto the vise |
|
|
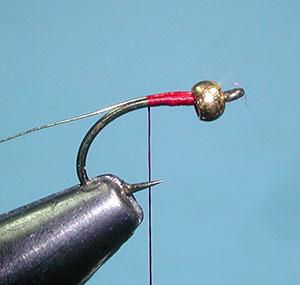
| 2. Attach a wire ribbing and lay a thread base securing the wire over the top of the shank. |
|
|
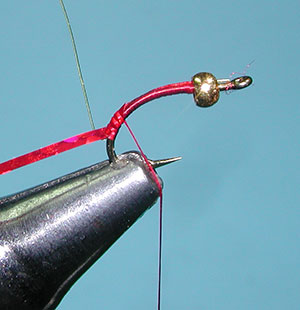
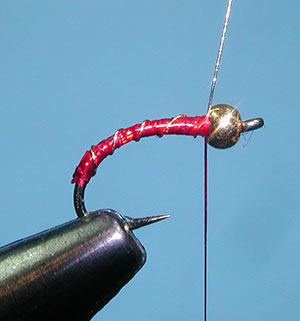
| 3. Create a thread foundation with the wire ribbing at the top of the hook shank to the bend of the hook. |
|
|
|
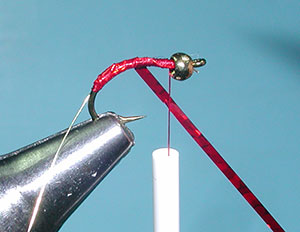
4. Take a piece of tinsel and trim the end into a point, anchoring the point to the bend of the hook where the thread fouindation ended |
|
|
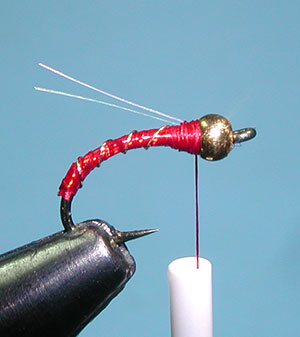
| 5. Wrap the thread back up to the bead and wrap the tinsel with slight overlaps up to the bead and secure with thread wraps. |
|
|
| 6. Trim off the tag end of the tinsel. |
|
|
|
7. Wrap the wire ribbing in widely spaced spirol wraps up to the bead and secure with a few thread wraps. |
|
|
|
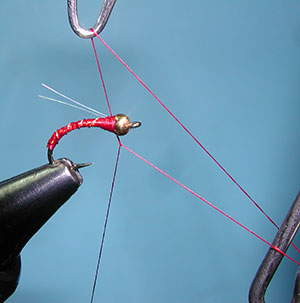
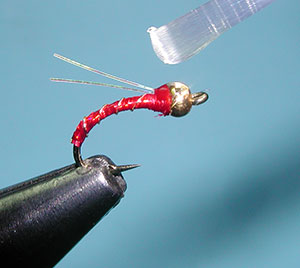
8. Wiggle the wire tag end so that it breaks off near the bead. Take a piece of mylar flash over the thread and attach the piece to the top of the hook shank behind the bead. Add a number of thread wraps as a collar behind the bead keeping the bead very secure. |
|
|
| 9. Whip Finish. |
|
|
| 10. Apply some Super Glue to the thread collar for durability. Some apply Super Glue to the whole midge but this distracts both the holographic qualities of the tinsel and subdues the wire ribbing. I think it's better just to apply the glue to the collar. |
|
|
|
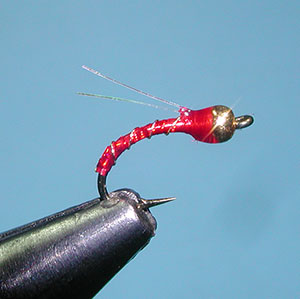
11. The finished Holo Midge, Red |
|
©2023 Steve Schalla
This page is not to be copied without
my explicit permission.