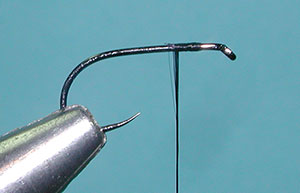
| 1. Attach the thread about an eyelength behind the eye. |
|
|
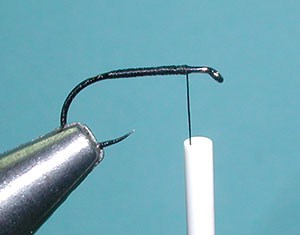
| 2. Build a thread foundation from behind the eye to the bend of the hook and back again. |
|
|
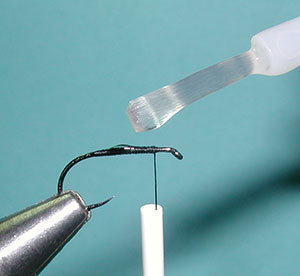
| 3. Apply some zap-a-gap to the top of the thread foundation. |
|
|
|
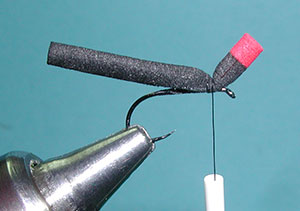
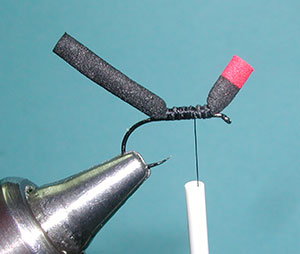
4. Place the ant body with the black part of the body extending about an eyelength beyond the eye. Secure with a couple of tight thread wraps |
|
|
| 5. Secure the middle of the ant body to the shank with tight thread wraps to the bend of the hook. Bring a couple of thread wraps behind the rear tag of the body. |
|
|
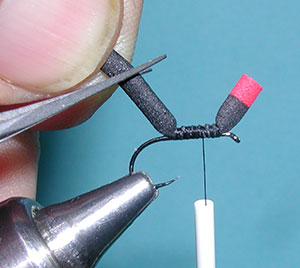
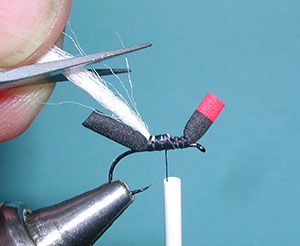
| 6. Trim the rear tag of the body so that it is about the same height as the font section. |
|
|
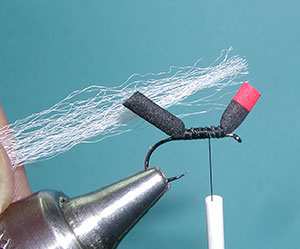
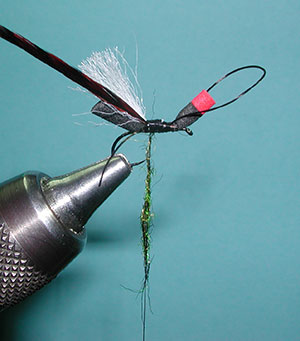
| 7. Divide the Poly Yarn into a smaller number of fibers. I'm using about a third of the yarn strand. |
|
|
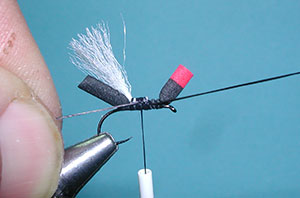
| 8. Place the middle of the yarn on the thread and secure the yarn to the top of the ant body in front of the rear segment. Double the yarn over the thread and secure the base of the yarn with tight thread wraps. | |
|
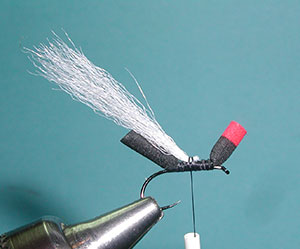
| 9. Trim the yarn wing so that it is just above the height of the body. |
|
|
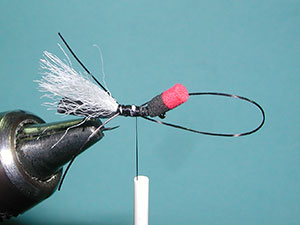
| 10. Place the leg material at the rear with about 4 thread wraps securing the material along the near side of the hook shank up to the base of the front section. |
|
|
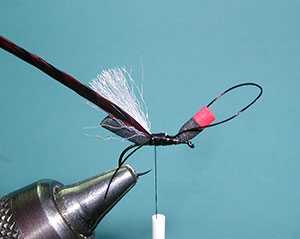
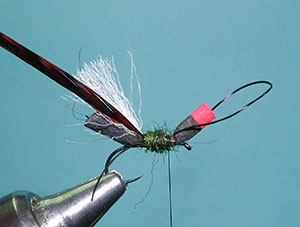
| 11. Loop the leg material around the front of the body and secure with a thread wraps at the base of the front section along the far side to the rear section. Apply thread wraps to the middle section between the legs for a smooth body. |
|
|
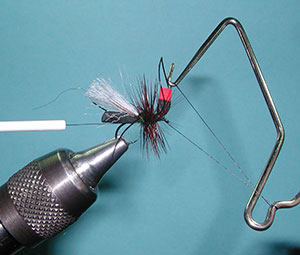
| 12. Next, secure a saddle hackle that is about two sizes larger than the hook at the base of the Poly wing. |
|
|
|
13. Apply dubbing to the thread. |
|
|
| 14. Wrap the dubbing for a dubbed body in the middle section. |
|
|
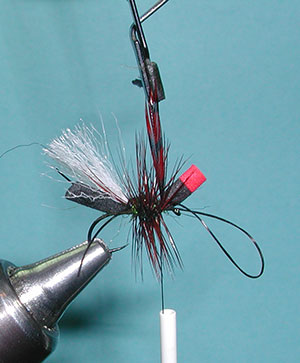
| 15. Wrap the hackle forward about 4-5 times to the base of the front section. Secure hackle with a couple of tight thread wraps. |
|
|
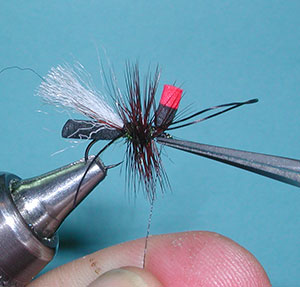
| 16. Trim off the saddle hackle tag and wrap a few times just in front of the foam body behind the eye. |
|
|
| 17. Whip finish. | |
|
| 18. Trim off the thread |
|
|
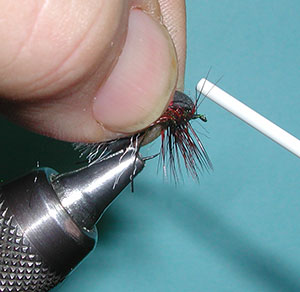
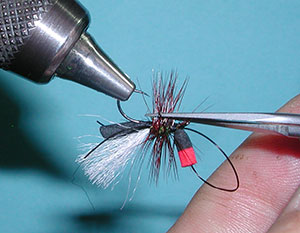
| 19. Trim the hackle, from beneath the body close to the shank. |
|
|
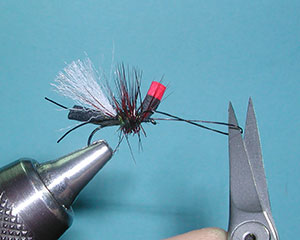
| 20. Cut the front loop of legging material and trim the four legs to suit. | |
|
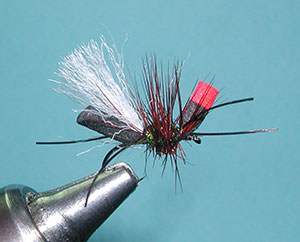
| 21. The finished Bionic Ant. |
|
©2023 Steve Schalla
This page is not to be copied without
my explicit permission.