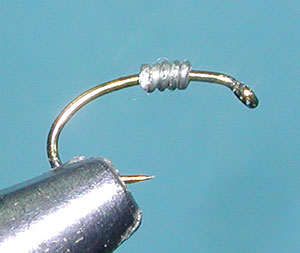


| 1. Attach the hook to the vise. Add 4-5 wraps of lead-free wire around the thorax region. Leave some space behind the eye of the hook. |
|
|
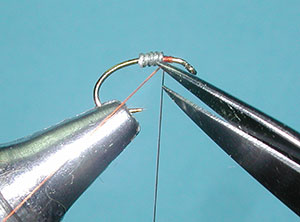
| 2. Attach the thread to the hook behind the eye, leaving a 3 " tag of thread. Trim off this tag of thread. It will be used for ribbing. |
|
|
| 3.Secure the leadfree wire with thread wraps and build a thread base from behind the eye to the tail tie-in position. Keep the thread body even and smooth. |
|
|
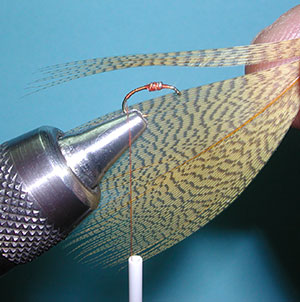
| 4. Select 8-10 fibers of Woodduck or Imitation Woodduck for the tail. Keep the tips of the tail segment even. | |
|
|
5. Attach the tailing fibers with a couple of wraps and adjust the tail length so that it extends to just below the hook. Then secure with additional wraps. |
|
|
|
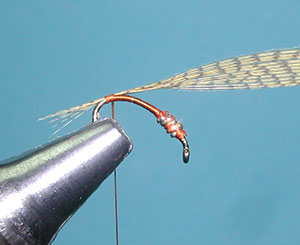
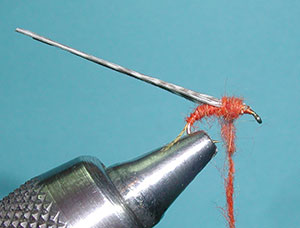
6. Secure the butt of the tail fibers along the shank with thread wraps to just behind the lead wraps.. Finish the wraps with some acrylic head cement for a shiny surface. This will add to the translucent effect of the fly. |
|
|
|
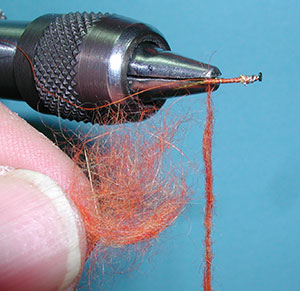
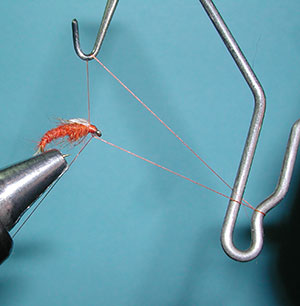
7. Mix a dubbing blend and attach some dubbing blend to the thread at the tail tie-in position. Lock in enough fibers with one wrap that you can twist the dubbing around the thread in a loose manner. |
|
|
|
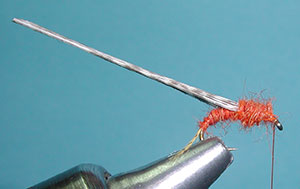
8. Dub a slender, tapered body to just past the midpoint of the hook. |
|
|
| 9. Remove the unused dubbing from the thread and secure with some thread wraps. | |
|
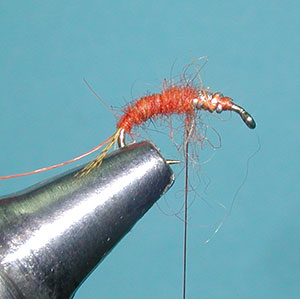
| 10. Wrap the thread ribbing forward with even-spaced turns. Secure with a couple of thread wraps. | |
|
|
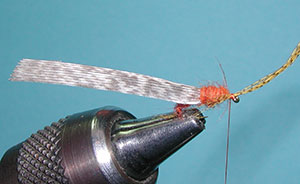
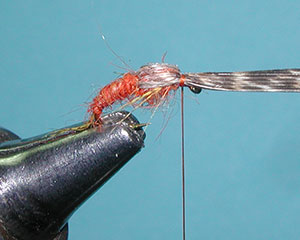
11. Attach a strip of Turkey tail for a wingcase. |
|
|
|
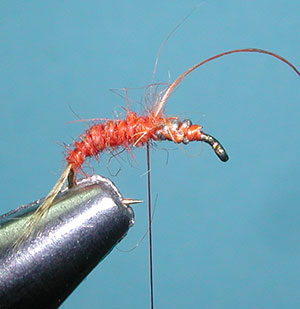
12. Apply dubbing to the thread and interlock the dubbing fibers to the hook shank with one wrap. Wrap a heavy thorax that is about 50% larger than the abdomen. |
|
|
|
13. Leave enough room behind the eye to secure the wingcase. |
|
|
|
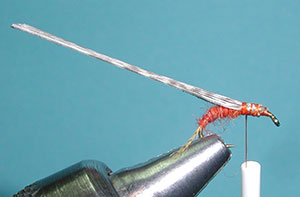
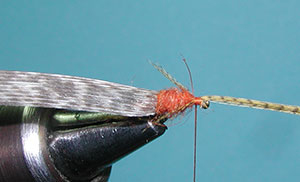
14. Attach 5-6 Woodduck fibers to the near side of the shank in front of the thorax. These represent legs and should extend just past the wingcase. Adjust the length of the fibers so that they do not exceed the length of the thorax. Secure with a couple of tight thread wraps and trim off the butts. |
|
|
|
15. Attach another set of 5-6 Woodduck fibers to the far side of the shank in front of the thorax and adjust the length so that the fibers do not exceed the length of the thorax. Apply a couple of tight thread wraps and trim off the butts. |
|
|
|
16. Bring the wingcase over the thorax and tie in. |
|
|
|
17. Create a head in front of the wingcase and whip finish. A little head cement to the wingcase helps to preserve the fibers. |
|
|
|
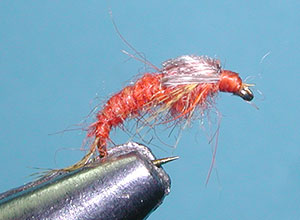
18. The finished Hunchback Infrequens. |
|
©2023 Steve Schalla
This page is not to be copied without
my explicit permission.