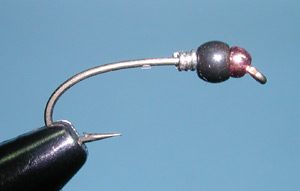

| 1. Place a 5/64 copper bead on the hook, followed by a 7/64 Black Bead that is flipped so that the larger cavity encapsulates part of the smaller bead. A few wraps of 0.015" leadfree wire will fill the other cavity and help snug the beads to the eye. |
|
|
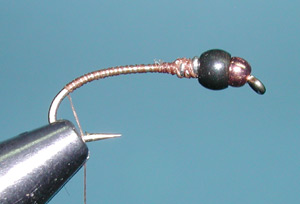
| 2. Attach the thread and secure the leadfree wire. Wrap the thread to the bend of the hook. |
|
|
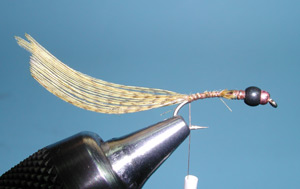
| 3. Snip a section of Woodduck dyed Mallard Flank and attach the section by the tips to the top of the hook shank with the dull side up. This will allow the natural barbs to flow back when you pull the feather section over. Greg Vinci uses Gadwall feathers, which are very similar, and colors them with a marker. |
|
|
|
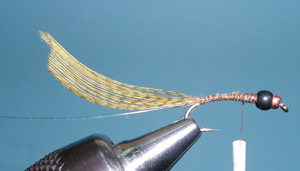
4. Attach a piece of 5X Tippet as a ribbing to the bottom of the hook shank. Bring the thread to just behind the wire wraps. |
|
|
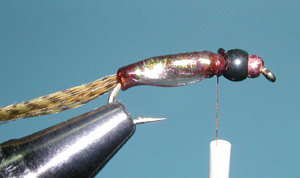
| 5. Attach a piece of 1/4" Tan Scudback to the top of the shank with the sides wrapping around the shank. Place a piece of thin pearlescent flashabou on top of the scudback. | |
|
| 6. Secure the scudback and flashabou along the hook shank to the bend of the hook. Keep the material centered on the top of the hook shank with the sides encapsulating the shank. |
|
|
| 7. Wrap the flashabou forward the the wire wraps with overlapping wraps and secure at the wire wraps. Trim off the tag end. |
|
|
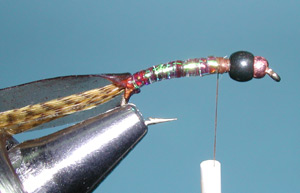
| 8. Bring the scudback over the shank with the sides equally on both sides and secure the material with thread wraps behind the bead. Trim off the tag. |
|
|
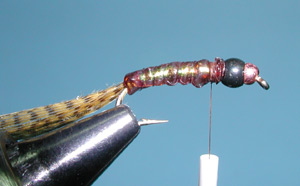
| 9. Wrap the ribbing with 7-8 equally spaced wraps forward over the scudback. Take care that the ribbing does not fold back the edge of the scudback as it should smoothly encapsulate the shank. This ribbing gives the body it's segmented appearance. Secure the ribbing behind the bead and trim off the tag. |
|
|
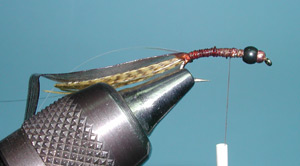
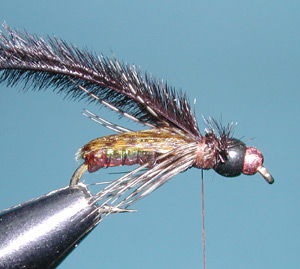
| 10. Bring the Mallard Flank over the body and secure with thread wraps behind the bead. |
|
|
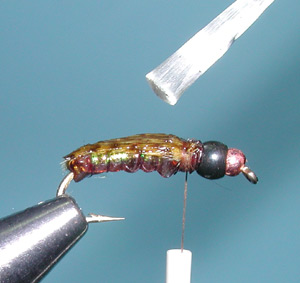
| 11. Trim off the tag end and apply a coating of Acrylic (Sally's Hard as Nails) to the Mallard Back. |
|
|
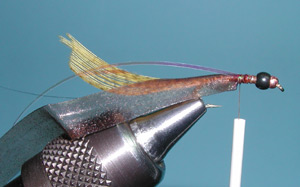
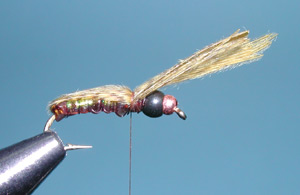
| 12. After the Acrylic has throughly dried, attach a section of partridge feather to the top of the shank behind the bead. The partridge feather has it's tip cut out creating a v-shape to allow most of the fibers to position themselves on both sides of the shank. You can adjust the length of the fibers by pulling on the quill stem and secure with thread wraps. Trim off the tag. |
|
|
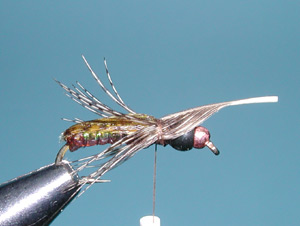
| 13. Attach 2-3 pieces of Ostrich Herl by the base just behind the bead. |
|
|
| 14. Wrap the Herl 2-3 times and secure with thread wraps behind the bead. Whip Finish. |
|
©2023 Steve Schalla
This page is not to be copied without
my explicit permission.