
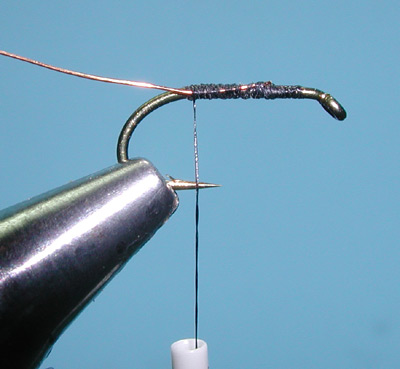


| 1. Attach a hook to the vise. I am using a size 14, Daiichi 1530 Heavy Wet Fly hook which is 1X Short. Attach the thread behind the eye and lay a thread foundation to the bend of the hook. |
|
|
| 2. Attach a small copper wire to the side of the shank and secure to the bend of the hook. |
|
|
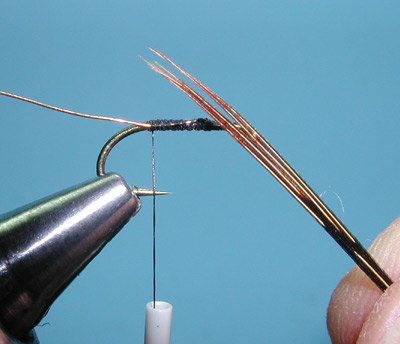
| 3. Clip 5-6 Pheasant Tail fibers and even the tips. Pheasant Tail fibers have small barbs along the sides that adhere to one another like velcro. To even the tips, you need to separate each fiber and even the tips by pulling each fiber. |
|
|
| 4. The length of the tail should be about one shank length. Attach the tail fibers to the bend of the hook with two thread wraps. The tag ends of the pheasant tail fibers will constitute the abdomen or body. |
|
|
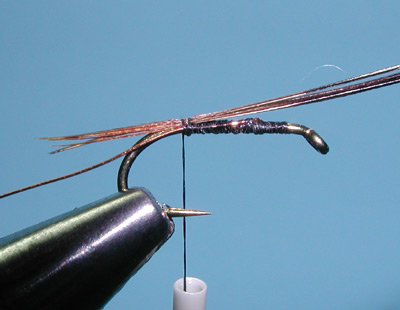
| 5. Wrap the thread back to behind the eye of the hook where the throax will be created. The tag end of the Pheasant Tail is only secured by the two thread wraps and the bundle is twisted a few times to keep the fibers together. | |
|
| 6. Wrap the Pheasant Tail rope forward creating the abdomen body. Secure the tag ends of this rope with thread wraps behind the eye near the thorax position. |
|
|
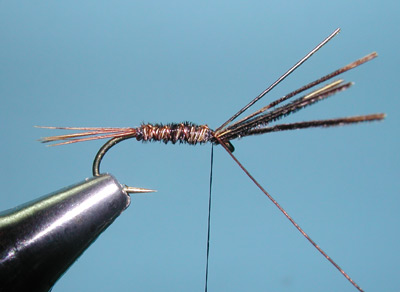
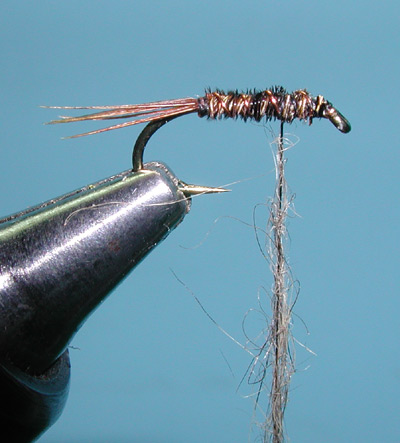
| 7. Wrap the copper ribbing wire in the reverse direction of the pheasant tail to lock in the fibers and help to protect broken fibers from unraveling. Secure the wire ribbing with thread wraps. |
|
|
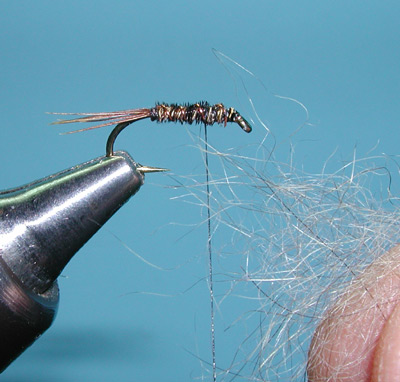
| 8. Clip off the tag ends of the Pheasant Tail and position the thread at about the 2/3 position of the shank. This is where the throax will be constructed. Yvon like to use Hare's Ear Plus or Peacock Ice Dubbing for the throax. I am using Hare's Ear in this tutorial. Get a small amount of fibers to dub to the thread. |
|
|
| 9.Twist the dubbing around the thread fairly tightly but still allowing some fibers to stick out from the rope. |
|
|
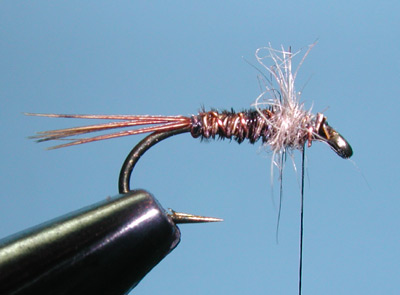
| 10. Wrap the dubbing creating a thorax yet still leave some room for the Partridge Hackle and head. | |
|
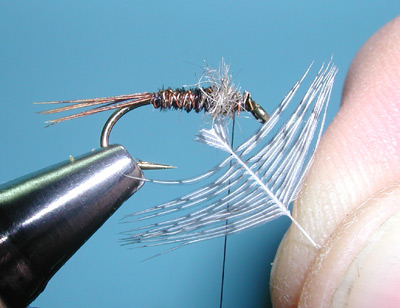
| 11. Obtain a Partridge Hackle in which the length of the fibers are about twice the hook gap. The fibers are brushed back from the tip and the tip is cut back leaving a smaller area of quill that can be secured just behind the eye of the hook. |
|
|
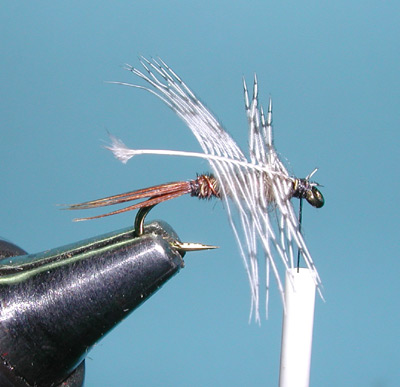
| 12. Position the hackle so that the fibers sweep back towards the tail. The tip is secured just behind the eye with thread wraps. |
|
|
| 13. These small hackles will only provide a couple of turns which is enough. When turning the hackle, make sure that you do not capture the preceeding wrapped fibers. You want to create as much movement as possible. Secure the bare quill stem with thread wraps just behind the eye. | |
|
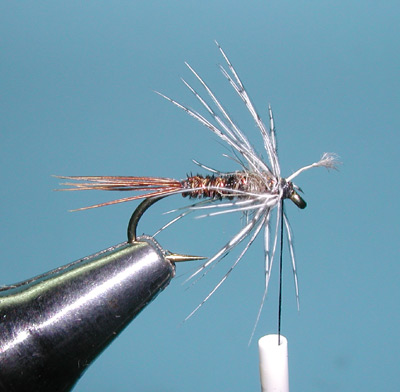
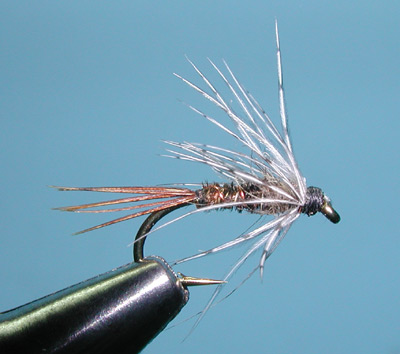
| 14. Clip off the tag end of the Partrdige hackle and wrap a small head. Some of the thread wraps will work against the partridge fibers sweeping the fibers back towards the tail. The thorax works from the other direction in keeping the partridge fibers lifted. Finish with a Whip Finish and apply head cement. |
|
|
©2023 Steve Schalla
This page is not to be copied without
my explicit permission.