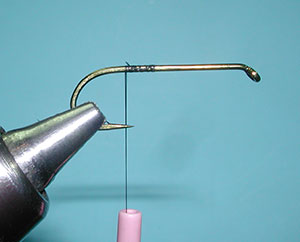

| 1. Attach the hook to the vice and attach the thread to the midpoint of the hook wrapping to above the point. |
|
|
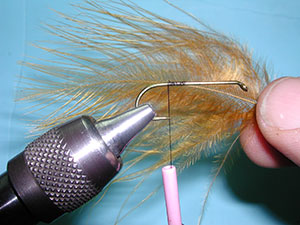
| 2. Select a plume marabou. You can use either the tip or the side fibers. Use about 30-40 strands of marabou from the quill, keeping the ends even. You may have to make to separate clippings to get enough strands. |
|
|
| 3. Measure the tips so that they are about the same as the shank length. |
|
|
|
4. Secure the marabou just above the point with thread wraps and wrap to the bend of the hook. |
|
|
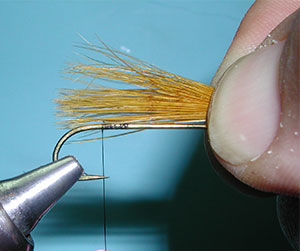
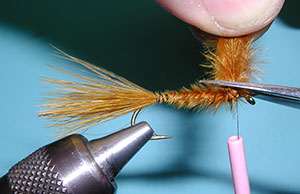
| 5. Twist the tag end of the marabou and wrap the marabou forward up the shank to the 3/4 position. | |
|
| 6. Secure with thread wraps at the 3/4 position and trim off the excess. |
|
|
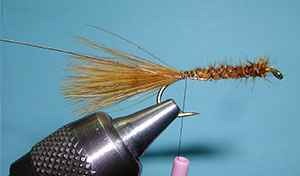
| 7. Attach a length of fine copper wire for a ribbing to the underside of the shank. Secure the wire with thread wraps to the tail tie-down position. |
|
|
| 8. Blend some UV Black with the UV Lt Olive Ice Dubbing. The Lt Olive makes up about 95% of the mix. Apply the dubbing blend to the thread and secure the dubbing to the hook shank with one wrap. Once the dubbing is locked to the hook shank, you can twist the dubbing around the thread to create a noodle. |
|
|
| 9. Wrap the noodle from the tail tie-in position to the midpoint of the hook shank creating a tapered body. Remove the excess dubbing from the thread as we are going to create a dubbing loop starting at the midpoint of the shank. |
|
|
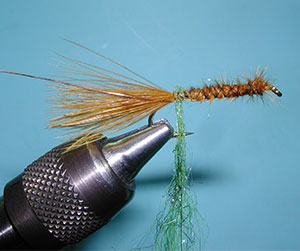
| 10. Create a dubbing loop of about 2-3 inches in length. You secure the loop by wrapping the thread around the loop at the shank and then wrap the thread to just behind the eye of the hook. The loop is held open by a dubbing tool such as Cal Bird's dubbing tool or a Griffin Spinning Loop tool. |
|
|
|
11. Apply the dubbing blend to the loop and twist the loop, the material closest to the shank will tighten first. |
|
|
| 12. Tighten the loop but do not overtighten. It should be somewhat bulky. | |
|
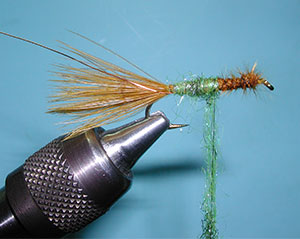
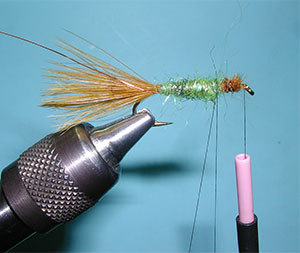
| 13. Wrap the loop forward to just behind the eye, leaving adequate room for a head. Trim any remaining dubbing and secure with thread wraps. |
|
|
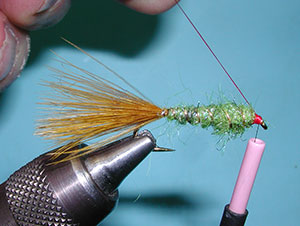
| 14. Bring the copper wire forward with evenly spaced wraps in a reverse method to counter the dubbing wraps. The ribbing will greatly help to secure the dubbing fibers. |
|
|
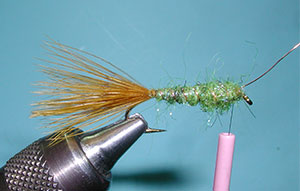
| 15. Secure a piece of red thread and wrap to create a small band at the rear of the head. This will represent the gills of the Punk Perch and is an attraction part of the pattern. |
|
|
| 16. Secure the red thread with thread wraps from your bobbin and create a small band of black in front of the red band. Whip Finish. |
|
|
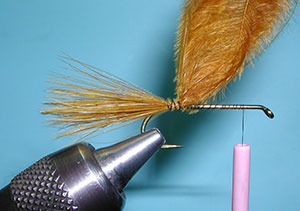
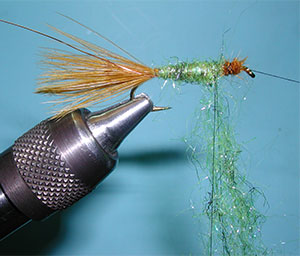
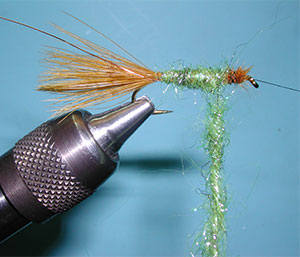
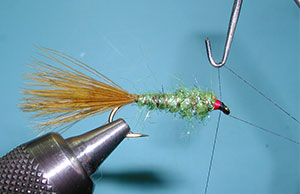
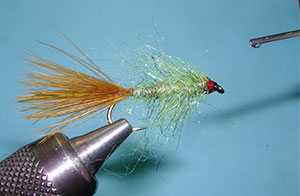
| 17. Then pick out the dubbing with a bodkin. You should get much longer fibers from the front half of the shank. Take a piece of velcro and work the material to blend the material and get it to flow in a backwards sweep. Trim any wayward fibers. Try to get a tapered silouette. The front fibers should be able to extend to the base of the tail. |
|
|
|
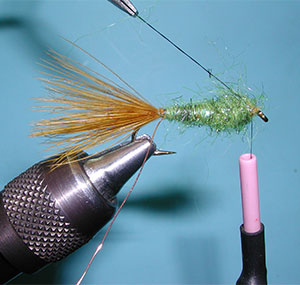
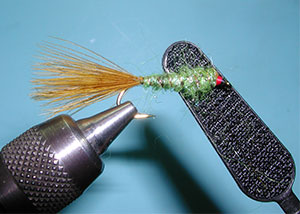
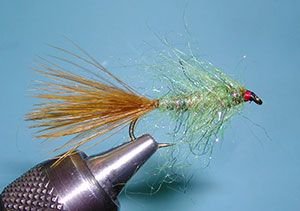
18. Apply a drop of head cement to the head. |
|
|
| 19. The finished Drifter's Punk Perch. | |
©2023 Steve Schalla
This page is not to be copied without
my explicit permission.