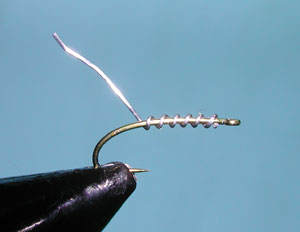

| 1. Place the hook to the vise behind the barb. Wrap the .010 wire about 6-7 times around the hook shank with evenly spaced segments. The segments should start just behind the eye and finish just above the point of the hook where the curve begins. |
|
|
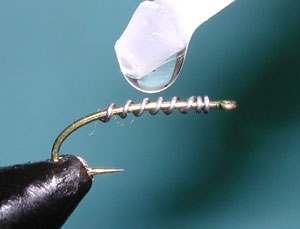
| 2. Apply a drop of Super Glue to the wire and remove excess with your fingers. Note: I created a small space behind the eye of the hook by moving the wire down the shank just a bit prior to coating with Super Glue. This is important for tying the gill material properly. |
|
|
|
3. Attach the Gray thread to the shank and apply some thread wraps around the wire nearest the eye. |
|
|
|
4. Attach the dubbing so that it extends over the eye of the hook. Secure with a couple of thread wraps just behind the eye. |
|
|
|
5. Trim off the butt end of the dubbing and secure with additional thread wraps, enough to cover all of the butt ends of the dubbing. Now continu8e to wrap towards the rear covering the wire wraps with thread. |
|
|
|
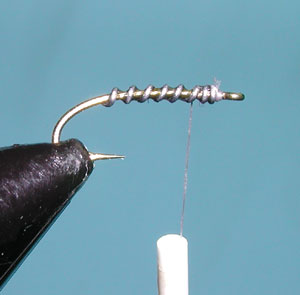
6. Wrap the Gray thread over all of the wire wraps but not too much to obscure the wire segmentations. |
|
|
|
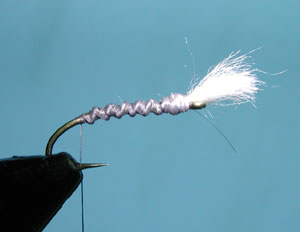
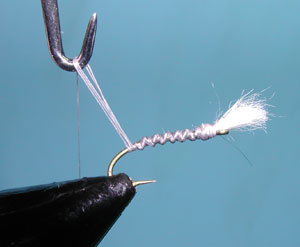
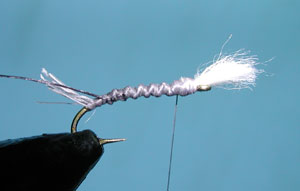
7. At the end of the wire wraps bring your dubbing tool to the end of the hook and use it to create thread loops from the base of the shank. About 5 thread loops will be needed. A thread wrap behind the loops will keep them from migrating further down the shank. |
|
|
|
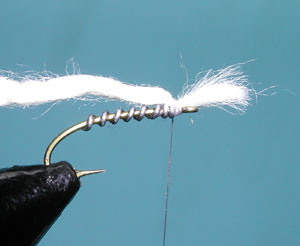
8. Pull your tool away, and secure the tailing fibers with some additional thread wraps at the base. Be careful not to build-up material here. |
|
|
|
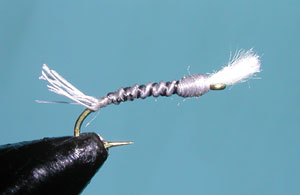
9. Clip the loops at an angle cut to the length you prefer for a tail. |
|
|
|
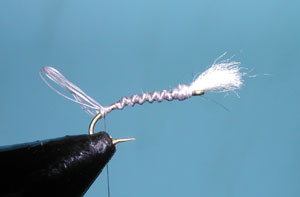
10. Now, attach the Black thread ribbing just in front of the tail and secure with thread wraps. |
|
|
|
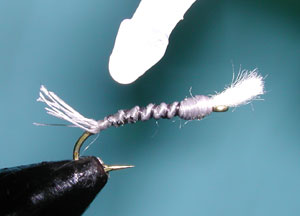
11. Wrap the ribbing forward between the wire segments. Secure the ribbing at the area you tied in the dubbing. Build this area up with additional thread wraps. The head of the midge should be about twice the thickness as the lower body and should represent about a quarter of it's length which includes the tail. Use a whip finish and trim off the thread. |
|
|
|
12. Apply a drop of Super Glue to the body and tail. Take care not to get any glue on the gill material. I will put a drop of Super Glue on the body and then spread the glue with my bodkin. |
|
|
|
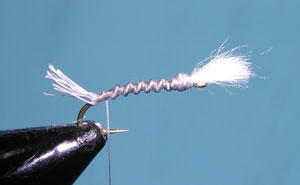
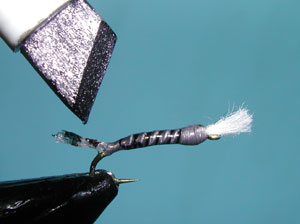
13. Carefully mark the tailing material with black segmentations using a permanent, waterproof marker. |
|
|
|
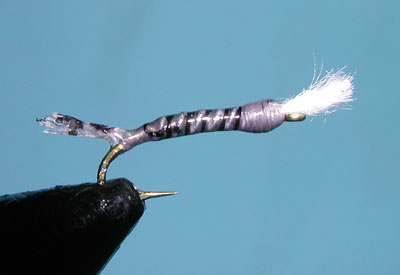
14. This is the finished Optimidge. |
|
©2023 Steve Schalla
This page is not to be copied without
my explicit permission.