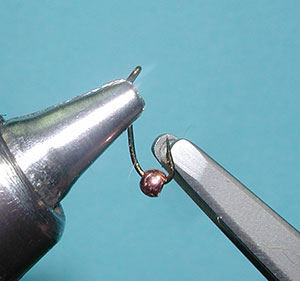

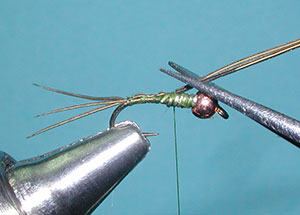
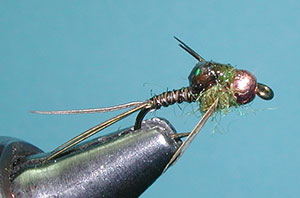
| 1. Flatten the barb of the hook with the vise and slide a small copper bead onto the hook to the eye. |
|
|
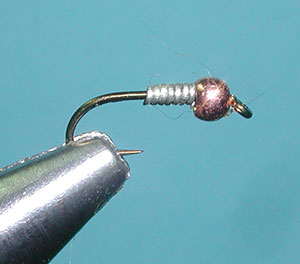
| 2. Wrap some leadfree wire wraps behind the bead to fill the bead void and to define the thorax region. |
|
|
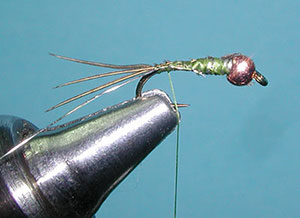
| 3. Attach the thread behind the leadfree wraps and and secure the wraps with the thread. Lay a thread foundation to the bend of the hook. |
|
|
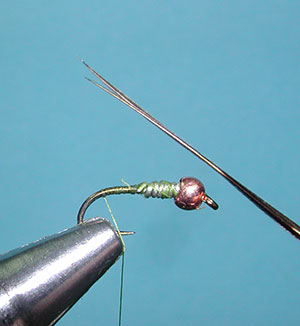
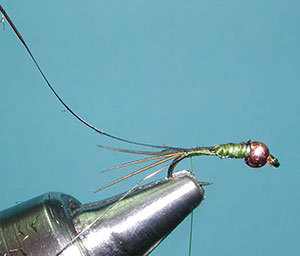
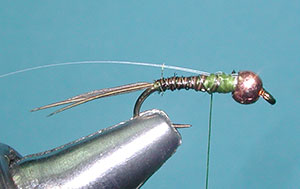
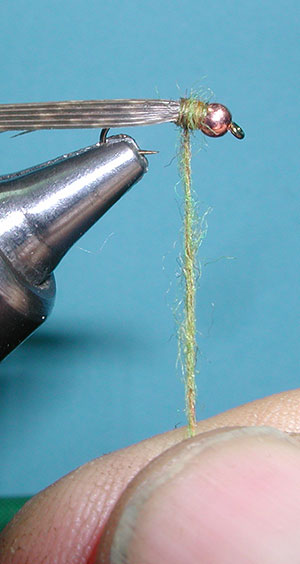
| 4. Select 3 Ringneck Pheasant Tail fibers dyed Yellow from the center of a tail feather. These fibers tend to be rigid and will splay into separate fibers with proper thread tension.
|
|
|
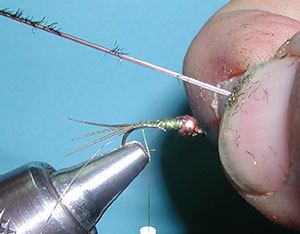
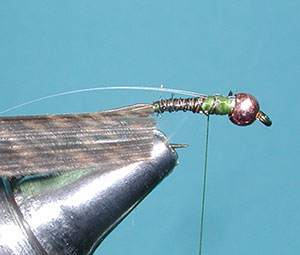
| 5. Attach the fibers to the top of the hook shank with the length of the tail equal to the shank length. Two tight wraps of thread to splay the fibers, then secure the tag end of the pheasant tail fibers up to the leadfree wraps with thread wraps. | |
|
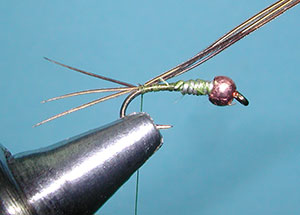
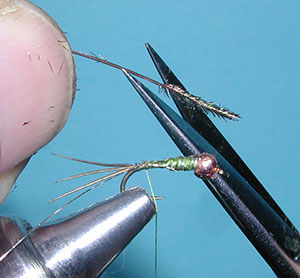
| 6. Snip off the remaining tag end and apply some more thread wraps to smooth the body. |
|
|
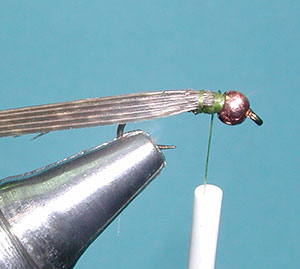
| 7. Attach a fine Silver Wire along the side of the hook shank for a ribbing. Secure to the tail tie-in position. | |
|
| 8. Next, prepare a stripped peacock herl by scrapping the herl with your fingernail on each side of the herl. Start at the base of the herl and work up. As you get closer to the tip of the herl, the herl gets quite weaker. |
|
|
| 9. Snip off the weak tip of the herl. |
|
|
| 10. Attach the tip of the stripped herl to the top of the hook shank securing the herl from the base of the wrapped leadfree wraps to the tail tie-in position. |
|
|
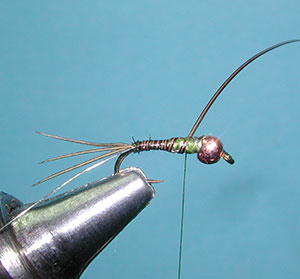
| 11. Wrap the herl forward with some overlapping wraps. Cover up to midway on the shank where the leadfree wire wraps begin. Secure the herl with thread wraps and trim off the tag end. |
|
|
| 12. Trim off the tag end of the herl and secure with thread wraps. | |
|
| 13.Wrap the Silver Wire ribbing forward with about 5 evenly spaced wraps and secure with thread wraps trimming off the tag end of the wire using a "helicopter" motion on the tag to break it off cleanly.. |
|
|
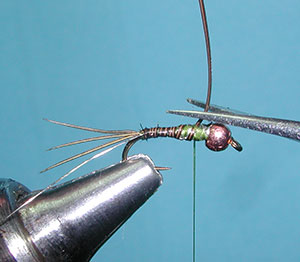
| 14. Attach a piece of flashabou on top of the hook shank just behind the bead with the tag end towards the rear. |
|
|
| 15. Cut a section of Dark Mottled Brown Turkey from a quill about the width of the hook gape. |
|
|
| 16. Attach the section behind the bead to the top of the hook shank with the dull side facing up. Secure the Turkey section up to the stripped Peacock Herl abdomen. |
|
|
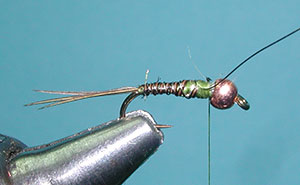
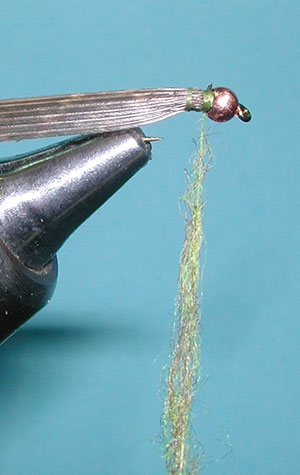
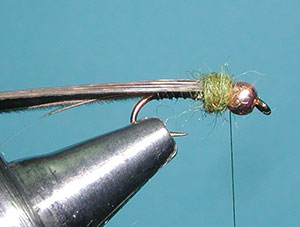
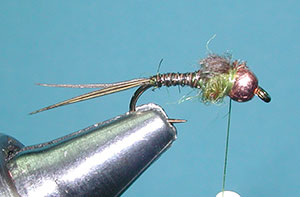
| 17. Apply dubbing to the thread for a thorax. Twist the dubbing around the thread and lock in a few fibers behind the bead. | |
|
| 18. With the fibers locked in, you can twist the dubbing around the thread for a rope and start wrapping the dubbing around the thorax region behind the bead. | |
|
| 19. Dub the thorax so that it is about twice as thick as the abdomen. Dub the thorax up to the bead. |
|
|
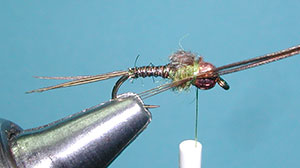
| 20. Pull the Turkey section over the dubbed thorax and secure with thread wraps behind the bead. Finally bring the single piece of flashabou over the center of the wingcase and secure with thread wraps. Apply a thin coat of epoxy to all of the wingcase. Keep this application thin so that you can control it's flow. Then, apply a second drop to the wingcase. The amount of epoxy applied is determined by the amount you have on the bodkin. The second drop will follow the area covered by your first application. After the wingcase is dry, wrap a dubbed collar to hide the thread wraps and whip finish. |
|
|
| 21. Finally bring the single piece of flat pealescent mylar over the center of the wingcase and secure with thread wraps. |
|
|
| 22. Trim off the tag ends of the turkey and tinsel. |
|
|
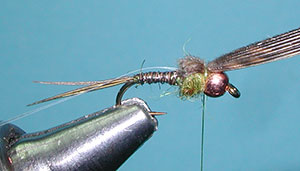
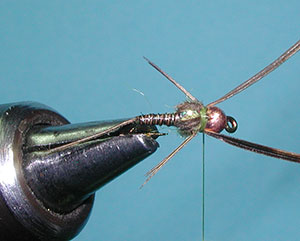
| 23. Select three Pheasant Tail fibers and even the tips. Attach the fibers to the side of the thoax behind the bead with one thread wrap and adjust the length of the fibers so that the tips do not extend past the abdomen. |
|
|
| 24. Do the same on the other side of the hook. | |
|
| 25. Apply a thin amount of dubbing to create a collar. |
|
|
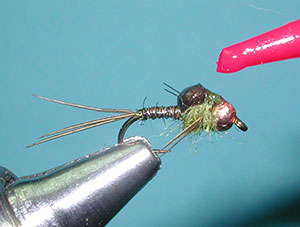
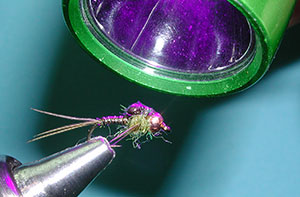
| 26. Whip Finish behind the bead. The collar dubbing will hide these wraps. Next apply a drop of thick UV fly finish to the turkey wingcase and the top of the dubbed collar. This will assure that the whip finish is locked behind the bead. Use a bodkin to bring the finish to all sides of the wingcase. |
|
|
| 27. Harden the finish with a UV lamp. |
|
|
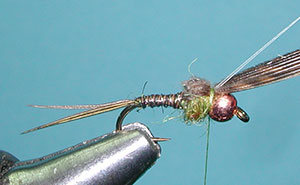
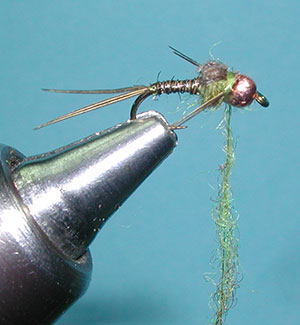
| 28. The finished Micro May, Olive |
|
©2023 Steve Schalla
This page is not to be copied without
my explicit permission.