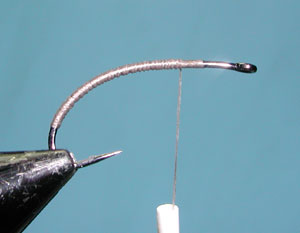
| 1. Mash down the barb and place a Partridge 15BN or 15BNX hook in the vise. Start the thread behind the eye and wrap a thread foundation down the shank to the bend of the hook and back again. |
|
|
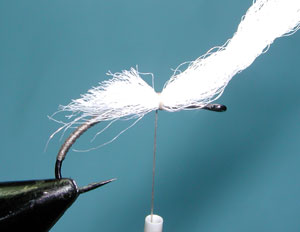
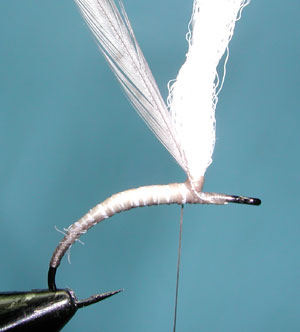
| 2. Cut a piece of Poly Yarn and attach the yarn at the 3/4 position on the shank with some pinch wraps. Keep the material on the top of the shank. Trim the butt end of the yarn at an angle. This will give a tapered underbody upon secureing with thread wraps. |
|
|
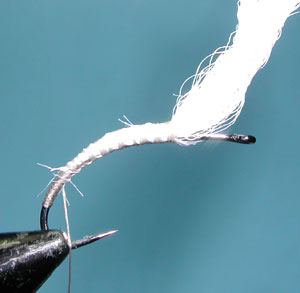
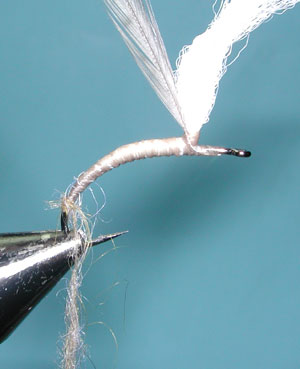
| 3. Wrap the thread around the yarn butt material, keeping the material on the top of the shank. Wrap to the bend of the hook and then back to the 3/4 position. |
|
|
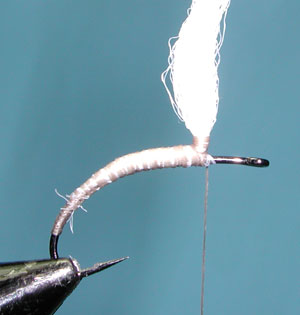
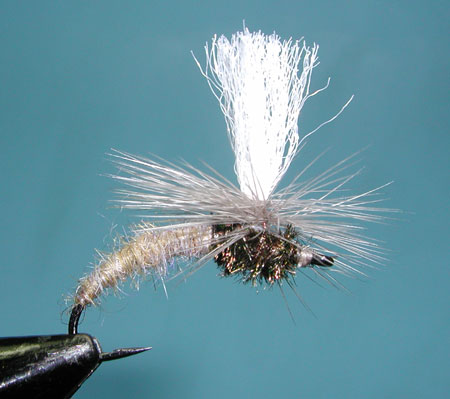
| 4. Wrapping back to the 3/4 position, you should see a nicely tapered underbody. Wrap a few turns of thread in front of the yarn to lift up the material. Then wrap around the base, anchoring some of the wraps with turns behind the wingpost to help keep the material upright. |
|
|
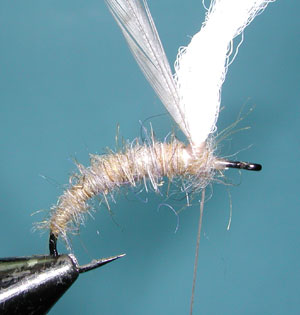
| 5. Select a hackle that is somewhat oversized to the hook. The hackle should have stiff barbs. Remove the barbs from the base of the hackle . Orient the hackle so that the shiny side faces the wingpost and secure the hackle base to the wingpost with thread wraps going around the base and also anchoring the bare hackle quill to the shank just behind the eye. There should be a small portion of bare hackle quill above the wrapped base to ensure no trapped hackle fibers. |
|
|
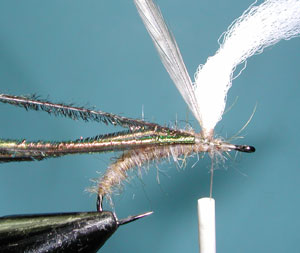
| 6. Wrap the thread back to the bend of the hook and apply a sparse amount of dubbing. The dubbing should barely cover the thread as to buiild a body that is not much thicker than the underbody itself. Hans prefers Fly Rite Poly dubbing, I'm using Kaufmann's Grammarus Scud Blend which has some long unruly fibers. These can be trimmed when you're done. |
|
|
| 7. Finish the dubbing just behind the wingpost. You can also apply some dubbing around the wingpost base to build an underbody for the thorax. |
|
|
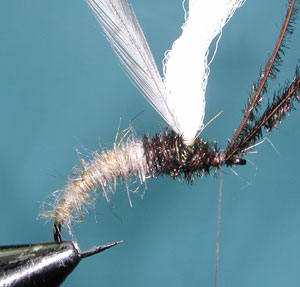
| 8. Select 3 Peacock Herls and attach the herls by the tips to the shank just in front of the wingpost. Secure the herls with thread wraps a little behind the wingpost as that is where the throax will begin. Bring the thread back to just behind the eye. | |
|
| 9. Keeping the herls together, wrap a thorax behind and in front of the wingpost. It should be built large enough to be larger than the abdomen. Wrap with a taper to just behind the eye and tie-off. |
|
|
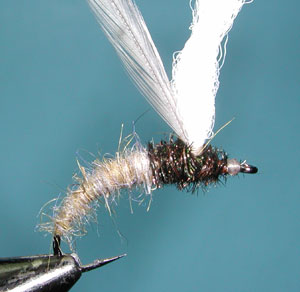
| 10. Trim the herl butts off and secure the butts with thread wraps. Whip Finish and cut the thread. |
|
|
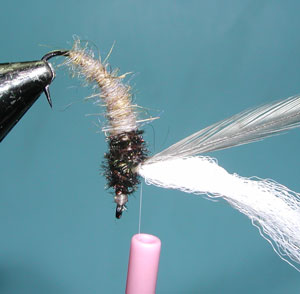
| 11. Reposition the fly so that the wingpost is horizontal. Attach the spiderweb thread to the base of the wingpost with some wraps and trim off the tag. |
|
|
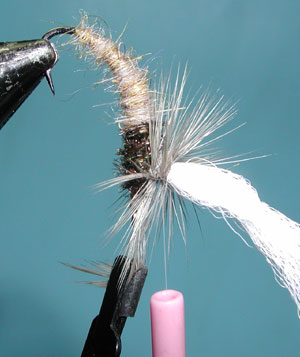
| 12. Fasten the tip of the hackle to your hackle pliers and wrap the hackle from the top of the wingpost base downwards. This will keep the fibers from being pulled downwards. You want a heavy hackle so use 7-8 wraps for sizes 12-14 and 5 wraps for sizes 16-18. After getting the proper number of wraps, bring the hackle pliers to the left, pulling the hackle over the thorax, and secure the hackle tip with several more thread wraps. You can apply a whip finish at the base of the wingpost to secure these wraps. | |
|
| 9.Trim off the remaining hackle tip and remove any errant fibers that may be going downwards. Trim the wing so that it is at least as long as the hook shank. |
|
©2023 Steve Schalla
This page is not to be copied without
my explicit permission.