
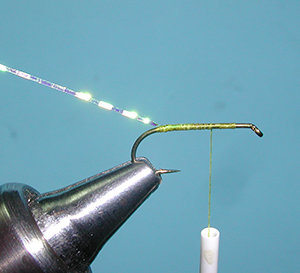

| 1. Attach the hook to the vise and secure the thread behind the eye laying a thread foundation to the bend of the hook. |
|
|
| 2. Secure a piece of Opal Flashabou to the bend of the hook. The Opal Flashabou provides different pearlescent colors at different angles or movement. |
|
|
|
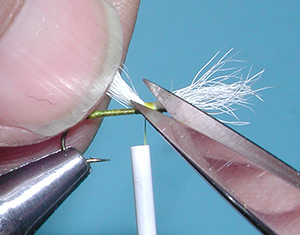
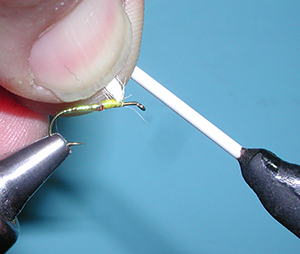
3. Clip a segment of Calf Tail for the wingpost. The fiber tips should be even from placing them within a hair stacker. Grasp the fibers at the position where the fibers are about the same length as the hook shank. |
|
|
|
4. Bring your hand with the fibers to a position about two eyelengths behind the eye and secure the fibers with 2-3 three thread wraps pulling up on the thread for tension. This will help in keeping the fibers on the top of the hook shank and not twisted around the shank. Apply about 5-6 more wraps going towards the bend of the hook. Lift up on the tag ends and clip off the tag with an angled cut. |
|
|
|
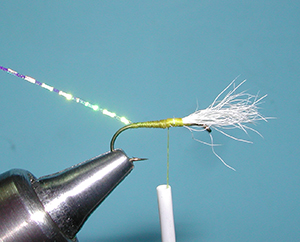
5. Wrap the exposed tag ends of the wing post with thread wraps, then build up a tapered body of thread from the wingpost to the bend of the hook. |
|
|
|
6. Wrap the flashabou forward with overlapping wraps and secure the tag end just behind the wingpost. |
|
|
|
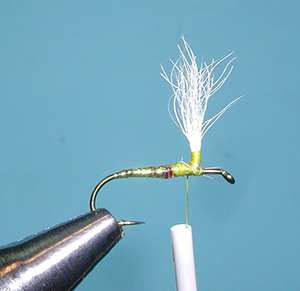
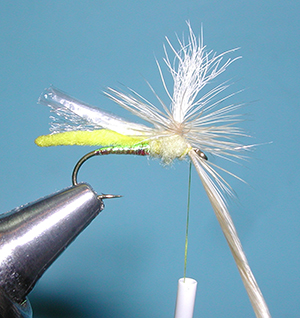
7. Next, lift up the wingpost and apply 2-3 tight wraps of thread against the front of the wingpost. This will assist in lifting the wingpost to a vertical position. |
|
|
|
8. Apply some further wraps around the base of the wingpost going up about an eyelength and back down to the hook shank. Bringing the thread with tension behind the wingpost will position the wingpost in a vertical position. |
|
|
|
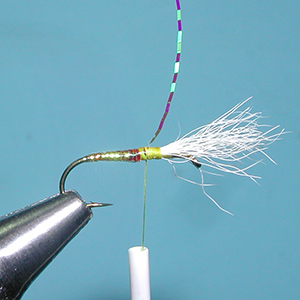
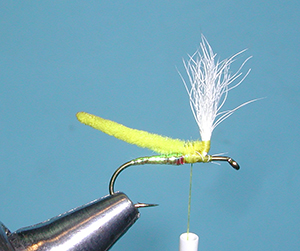
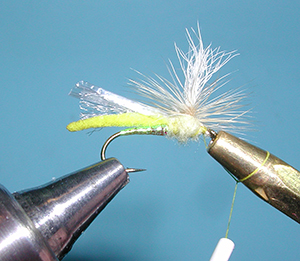
9. Clip off a piece of Ultra Chenille for the body. The body segment should extend beyond the bend of the hook about a half hook gap. You need to apply some heat to the tip of the material to get a tapered end. Ultra Chenille is denser than normal chenille and will react to heat much better. Use a Bic Lighter or a candle for the heat source and be careful as the material can become scourched or burned easily. Attach the butt section of the chenille just behind the wingpost with 4-5 tight thread wraps. |
|
|
|
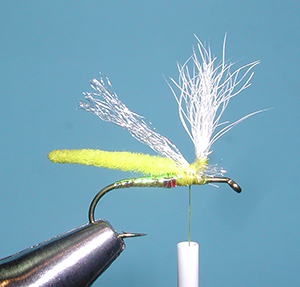
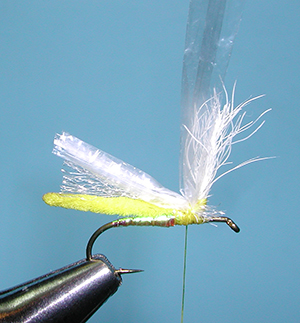
10. Secure an underwing behind the base of the wingpost as well. Light Dun Z-lon fibers make a good underwing. You could use Antron Yarn or Poly fibers as an alternative. |
|
|
|
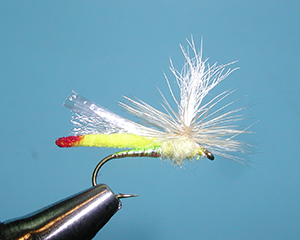
11. Attach a piece of Clear Wing just behing the wing post as well. Clear Wing is nothing more than some thin plastic film. It can provide a nice wrinkled texture. Medallion Sheeting or Swiss Straw are other materials that would work. Secure just behing the wingpost with 4-5 tight wraps and trim off the tag end. The wing should be no longer than the body. |
|
|
|
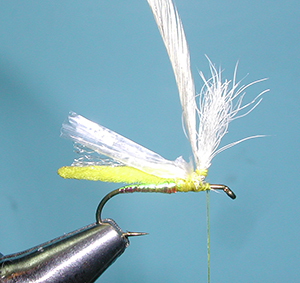
12. Secure a saddle hackle to the base of the wingpost. Prepare the hackle by removing the lower fibers to expose about a quarter inch of quill. Place the exposed quill against the side of the wingpost and secure the quill to the hook shank just in front the wingpost with a couple wraps. Then, secure the quill to the base of the wingpost with thread wraps going up the wingpost and back down about an 1/8th inch. |
|
|
|
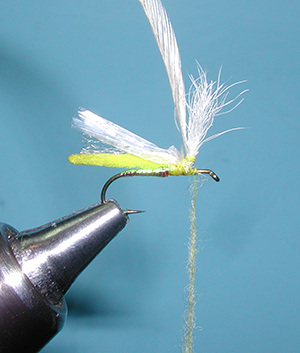
13. Apply a good dry fly dubbing to the thread. I am using Micro Fine dubbing from Hareline. Twist the dubbing around the thread. Bring the dubbing up the thread to the hook shank and wrap once around the shank to lock the fibers to the shank. |
|
|
|
14. With the dubbing fibers locked to the shank, you can twist the dubbing tighter around the thread and wrap the dub material around both sides of the wingpost to create a thorax. Finish just behind the eye. |
|
|
|
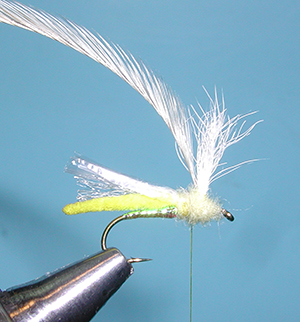
15. Wrap the hackle around the wingpost working down towards the thorax base. 4-5 wraps are adequate. Bring the hackle over the eye of the hook and secure the hackle with a tight thread wrap. Take care not to trap the hackle fibers. Apply 2-3 additonal wraps. |
|
|
|
16. Trim off the tag end of the hackle and apply a couple of half hitches behind the eye. You can use a whip finishing tool but I find a half hitch tool will do the job. Trim off the thread. Apply some head cement to the hitches. |
|
|
|
17. Apply some red marking to the butt section of the body and you have the Headlight Sallie. This is a good small stonefly pattern in sizes 14-16. |
|
©2023 Steve Schalla
This page is not to be copied without
my explicit permission.