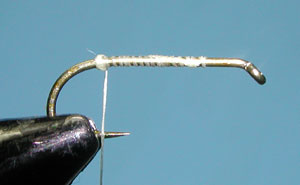

| 1. Attach the thread to the hook shank and lay a thread foundation to the bend of the hook. At that position create a small bump of thread. |
|
|
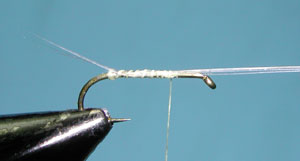
| 2. Clip 4-5 microfibbetts, keep the tips even. Measure the tailing material to be equal to the shank length of the hook. Position the material just behind the thread bump against the shank in front of you. A thread wrap will bring the material to the top of the shank and you can wrap the excess material to the top of the shank until you reach the 70% mark of the hook shank. |
|
|
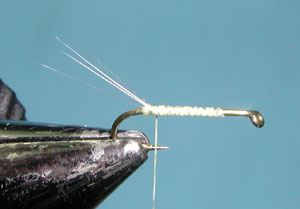
| 3. Wrap the thread back to the tail tie-in position and put your thumb under the microfibbetts behind the thread bump. Another firm thread wrap over the tailing material will splay the microfibbetts from the tension put on them against the thread bump. |
|
|
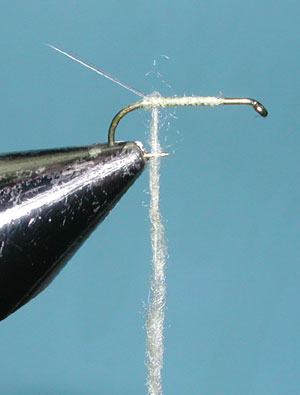
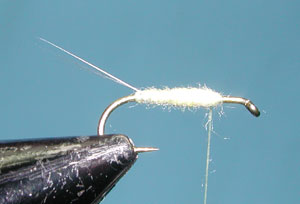
| 4. Apply a small amount of dubbing to the thread and secure the fibers to the shank with one wrap. You can increase the firmness of the dubbing by twisting the material on the thread once it's anchored to the hook shank. |
|
|
| 5. Wrap the dubbing forward to the 70% position for a tapered body. | |
|
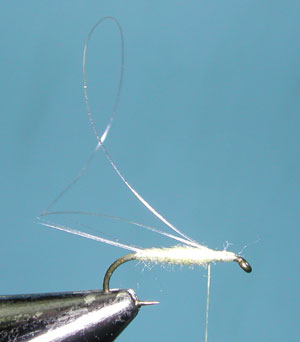
| 6. Cut a piece of 3" nylon thread and match up the ends of the piece. Anchor the ends just behind the eye of the hook and secure the nylon thread down to the 70% position. |
|
|
| 7. Build a thread base on the nylon thread loop. I find that rotating the loop towards you will help. Hold the loop with one hand as you move the thread bobbin around it with your other hand. I'll switch hands to facilitate the movement, but always keeping tension of the loop. |
|
|
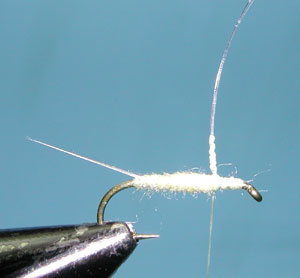
| 8. Obtain a hackle sized to the hook. Clean the butt fibers of the hackle off so that enough bare quill is available to anchor the hackle to the shank at the base of the nylon loop post and enough bare quill to anchor up the post about 1/3 the shank length. Again, having the loop facing you horizontally, will assist you in anchoring the quill to the base of the post. Make sure to keep the tension on the loop to maintain control. |
|
|
| 9. Attach hackle pliers to the end of the hackle and wrap the hackle down the post about 6-7 wraps. Again, keeping the loop horizontal, toward you....I find this method easier to hold the loop and control the wrapping of the hackle pliers. The last wrap will go over the hook shank at the base of the post and you secure the hackle with a couple of thread wraps. Now rotate the fly back into the upright position. | |
|
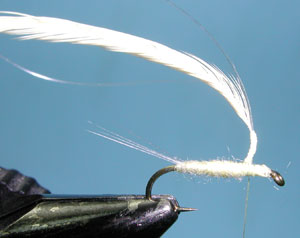
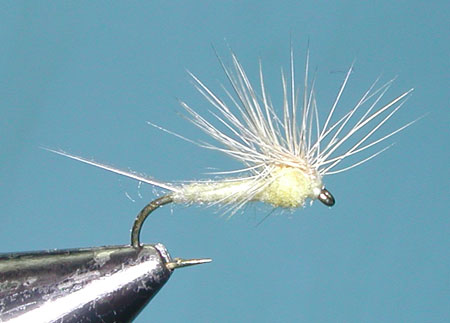
| 10. Clip of the excess hackle material and snip out any errant fibers. Pull the wrapped hackles back with your left hand and secure the last hackle wrapped at the base of the post with a few more thread wraps. Apply the thorax dubbing with a tight mound just in front of the hackle post. The thorax should be about twice the diameter as the abdomen. |
|
|
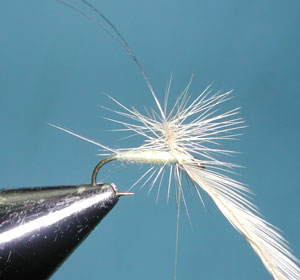
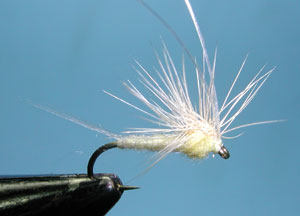
| 11. Bring the nylon loop over the dubbed thorax, securing the nylon just behind the eye. The hackles should be positioned on top of the dubbed thorax. |
|
|
| 12. Bring the nylon loop back towards the tail and add a number of additional wraps to secure the nylon thread. Whip Finish. | |
|
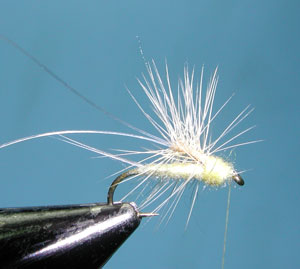
| 13. Trim of the excess nylon thread.. | |
©2023 Steve Schalla
This page is not to be copied without
my explicit permission.