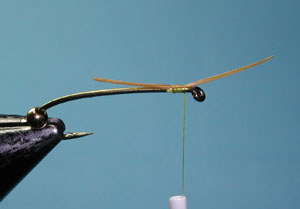


| 1. Place a bead on the hook and attach hook to vise. You may find it easier to position the biot antennae one at a time.
Attach a biot to the back side of the hook shank with the concave facing away from the shank just behind the eye. The biot
should extend no more than one half the shank length beyond the eye.
|
|
|
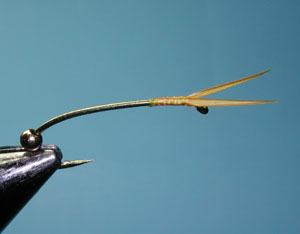
| 2. Attach the second biot with the concave facing out. Adjust the length to equal the first biot and secure
with thread wraps. Whip finish and cut the thread. Put a drop of head cement on the wraps prior to bringing the bead up
behind the eye. This will secure the thread wraps aned also help secure the bead.
|
|
|
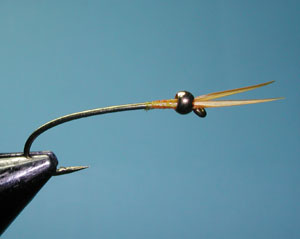
| 3. Slide the bead up to the eye encapsulating the biots. |
|
|
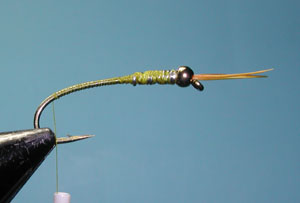
| 4. Wrap the lead wire around the thorax area and force the lead wraps into the socket opening of the bead.
Reattach the thread just behind the lead wraps. |
|
|
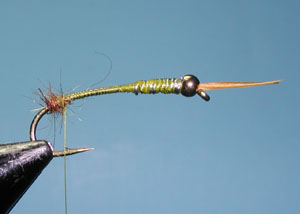
| 5. Secure the lead wraps with thread and bring the thread down to the tail tie-in position directly above the
hook barb. Apply head cement to the lead wraps to help secure.
|
|
|
| 6. Apply a small amount of Whitlock SLF Golden Stone dubbing as a ball at the tail tie-in position. This
will help to split the biots. |
|
|
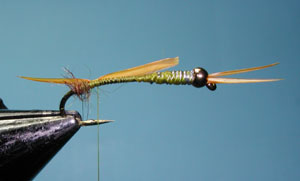
| 7. Attach a biot on the far side of the shank just in front of the dubbed ball, the concave side should face outwards.
The length of the biot tail should be about one half the shank length.
|
|
|
| 8. Add a second biot behind the dubbing ball so that the biots split with a 40 degree angle. Trim the biot tag
ends just behind the lead wraps. Secure the butt ends with thread wraps with a smooth tansition to the lead wraps. |
|
|
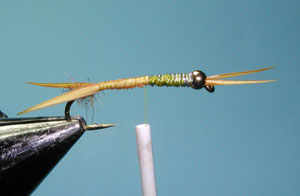
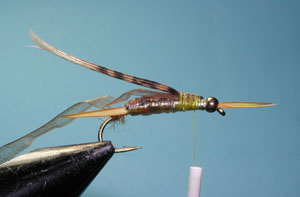
| 9. Attach a Tan Scud Back and a monofilament ribbing to the top of the shank behind the lead wraps and secure
to the tail tie-in position.
|
|
|
| 10. Next, attach a segment of Mottled Turkey Tail Feather on top of the Scud Back and secure from the lead
wraps to the tail tie-in position. This will be your carapace. |
|
|
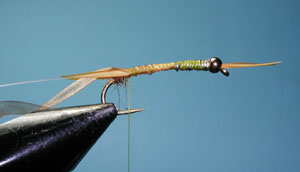
| 11. Apply even thread wraps from the tail tie-in position to the lead wraps for a smooth body.
|
|
|
| 12. Attach a clear Scud Back piece just behind the lead wraps. Wet the thread underbody with a waster-based
head cement ( I used Sally's Hard as Nails). Don't use a solvent-based head cement since it will react with the Scud Back
material. |
|
|
| 13. Wrap the clear Scud Back to the tail tie-in position
and then back to just behind the lead wraps. By wrapping less tightly on the return you get more of a taper
effect. Secure with thread wraps and clip the tags. |
|
|
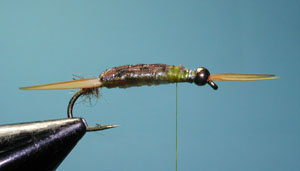
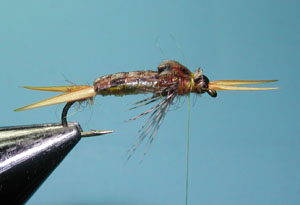
| 14. Bring the Turkey segment forward and secure with thread wraps in the center of the lead wraps. Keep the
segement centered over the top of the shank. Apply some water-based head cement to the top of the turkey segment.
|
|
|
| 15. Bring the Tan Scud Back forward and secure with thread wraps in the
center of the lead wraps. |
|
|
| 16. Wrap the ribbing with increasingly spaced wraps to center of the lead wraps and
secure with thread wraps. You should try to get 5 turns of ribbing. |
|
|
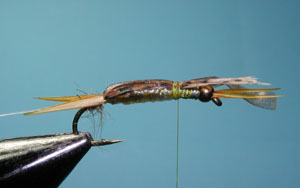
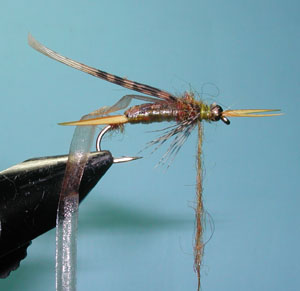
| 17. Attach a segment of Tan Scud Back to the thorax and secure to the end of the lead wraps. Next, attach a
segment of Mottled Turkey Tail and secure the same way.
|
|
|
| 18. Apply dubbing around the back half of the thorax.
|
|
|
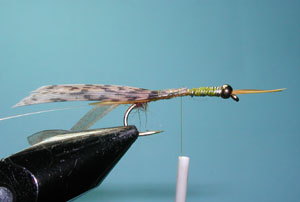
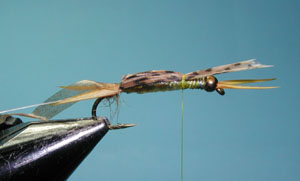
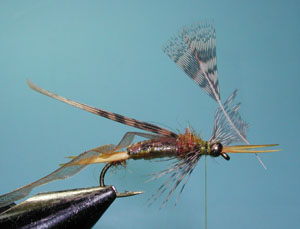
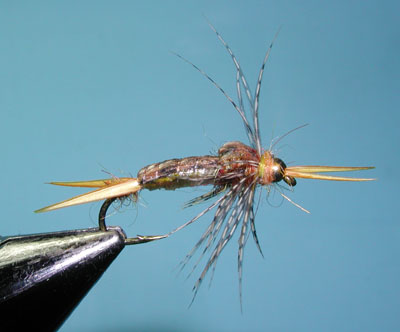
| 19. Attach a small clump of partridge fibers on each side of the thorax. They should be long enough to extend
to the base of the tail. |
|
|
| 20. Apply additional dubbing, leaving a gap of an area about the size of the bead. |
|
|
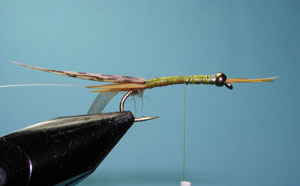
| 21. Bring the turkey segment forward, secure with thread wraps and apply a drop of head cement to the top of
the turkey segment. |
|
|
| 22. Next, bring the Scud back forward and secure with thread wraps. |
|
|
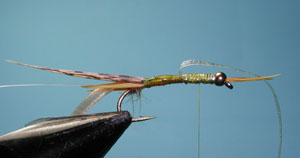
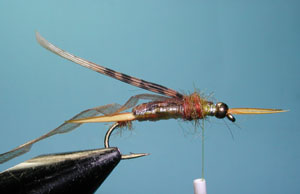
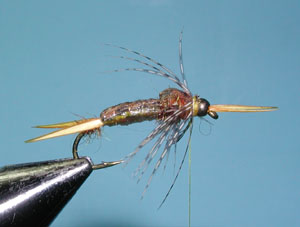
| 23. Prepare a partridge hackle whose fibers almost reach the base of the tail. Attach the hackle by the tip
behind the bead with the concave part facing you. |
|
|
| 24. With your fingers, message the fibers backwards and wind the hackle only one time behind the bead. Secure
the hackle with thread wraps and trim the excess. |
|
|
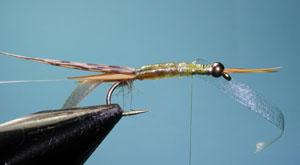
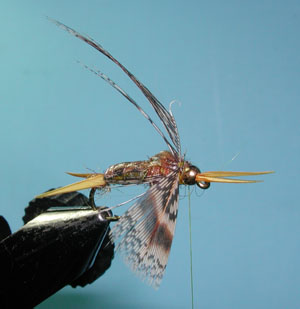
| 25. Dub a collar using the Whitlock Blend along with the Guard Hairs mixed-in. Whip Finish. |
|
©2023 Steve Schalla
This page is not to be copied without
my explicit permission.