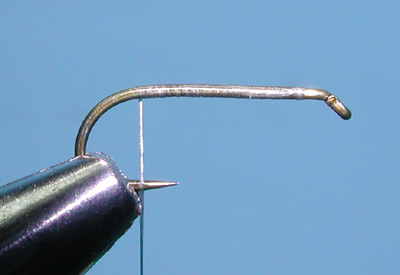


| 1. Lay a thread base from behind the eye of the hook to the bend of the hook. This thread base will help keep the material from shifting on the shank. |
|
|
| 2. Select two tailing hackles, one a grizzly and the other a brown. Tailing hackles, also known as Spade hackles, come from the edges of your cape. The fibers are stiffer and glassy. Massage the fibers back along the quill stem to ascertain length and to clip those you want for the tail. |
|
|
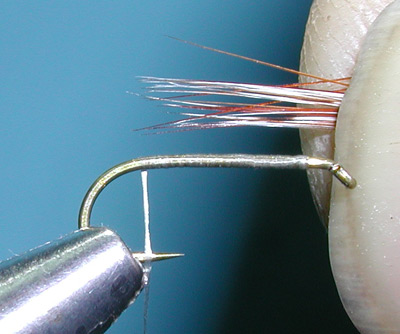
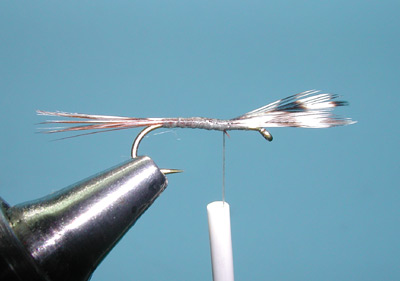
| 3. Select about 10-15 hackle fibers from both a brown and grizzly hackle. Match up the tips as best you can and attach to the top of the hook shank near the bend for a tail. The tail should be about the same as the shank length. |
|
|
|
4. Attach the clump for tailing fibers to the top of the hook shank. Try to keep the fibers within a tight bundle. Note that the length of the tail is about the same as the shank length. Secure the tag ends of the fibers with thread wraps. |
|
|
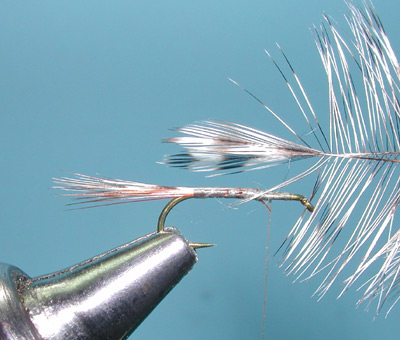
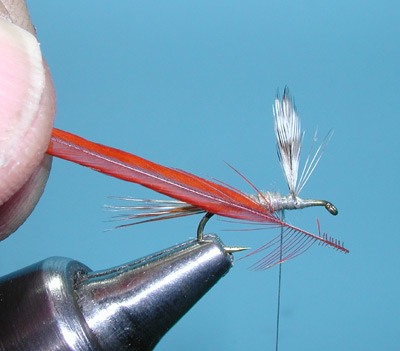
| 5. Select two grizzly hackles for wings. Hen hackles have a broad profile and can be used. However, Rooster hackles have a more pointed tip and the larger hackles provide enough breadth to make excellent wing material. Place the two hackles facing each other with the shiny sides together. Massage the fibers back from the base until you see the proper length of the tip which should be the same as the shank length. | |
|
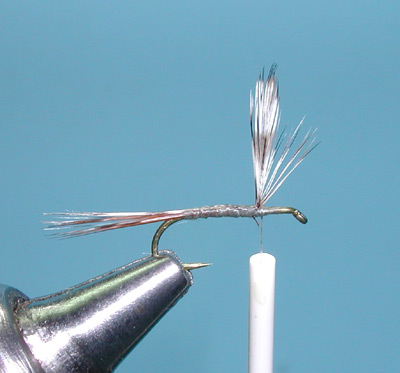
| 6. Place the two wing tips about 1/3 length behind the eye of the hook. The tips should point to the front of the hook over the eye. Place the thread wraps over the bare quill below the tips. Make sure that the tips do not shift as you want the tips to be parallel to each other and in line with the hook shank. Secure with tight thread wraps. |
|
|
| 7. Next, Lift up the wing tips and place a few thread wraps in front of the tips to support their position. | |
|
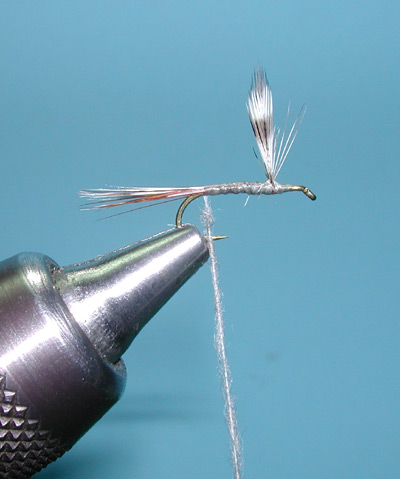
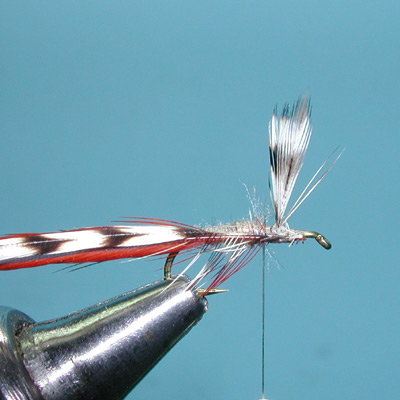
| 8. Wrap the thread with a couple figure eight wraps between the two wing tips to divide or space the tips at a 60 degree angle. Make sure that they are symetrical and centered over the shank. Then, wrap your thread back to the base of the tail. |
|
|
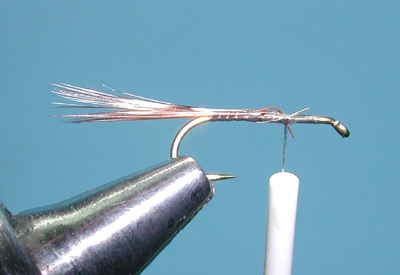
| 9. Apply a thin amount of dubbing on the thread. Muskrat dubbing was often standard for this pattern but has become more difficult to find. The synthetics, such as Superfine, make an excellent dubbing material in an Adams Gray color. |
|
|
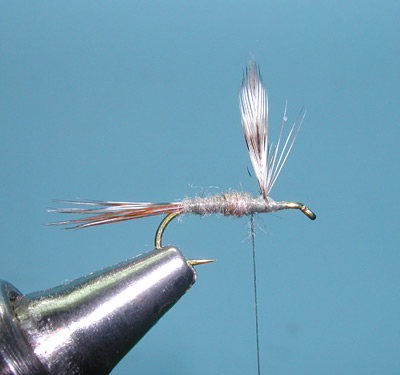
| 10. Wrap the dubbed thread over the shank starting at the tail tie-in position and create a tapered abdomen to just behind the wing. |
|
|
| 11. A Brown and Grizzly hackle, sized for the hook, is used for the hackle part of this pattern. I like to use Whiting 100's since they have a uniform width and the packages are sized for the hook. Prepare each hackle by massaging the base fibers back and clipping 5-6 fibers from each side of the quill. The nubs are where you will secure the hackle to the side of the hook shank and the nubs will assist in keeping the hackle within the proper orientation. Pull about 6-7 fibers off the quill in front of the nubs facing the wing tips. This space is important since it will assist you in elminating any fibers from getting trapped when you start to wrap the the hackle. |
|
|
|
12. Prepare the Grizzly Hackle in the same manner as the brown hackle and match the two hackles together with their shiny sides facing out towards you. Place the nubbed quills along the side of the shank below the wing tips. A couple of thread wraps in front of the wing and a couple of thread wraps behind the wing will hold these hackles in place without disturbing the wind tips. |
|
|
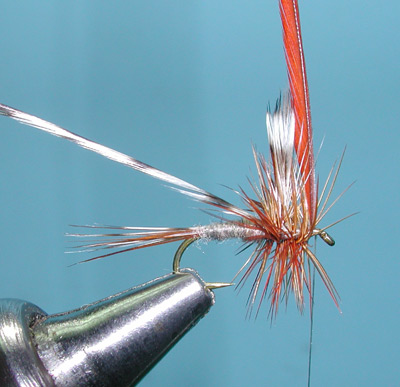
| 13. Wrap the hackles separately. Using the Brown Hackle, make three wraps behind the wing and 2-3 wraps in front of the wing. Keep some space behind the for a head. Secure the hackle in front of the wing with a tight thread wrap by bending the hackle enough to expose a space between the fibers and allowing the thread to make direct contact with the quill.Apply two of these locking wraps to the hackle, then apply 2-3 wraps of thread directly in front of the hackle and clip off the tag end. | |
|
| 14. Do the same with the Grizzly hackle, wrap three times behind the wing and 2-3 wraps in front of the wing. Lock this hackle behind the eye in the same manner as the first. Try to keep a sufficient amount of space behind the eye to creat a head. |
|
|
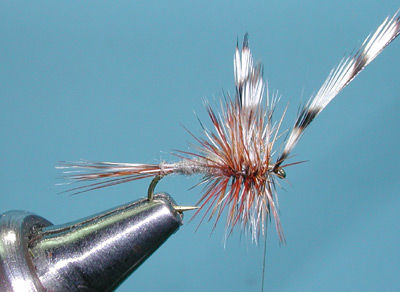
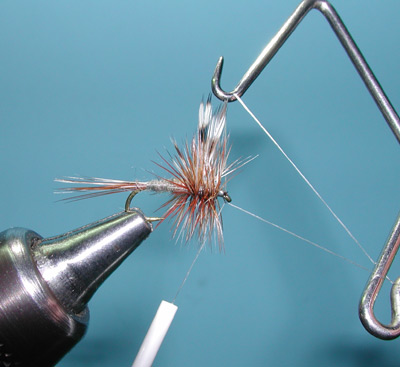
| 15. I wrap the thread infront of the hackle fibers creating a small head. Then, I use a half hitch tool to apply a couple of half hitches and secure the thread. Finally, I use a Whip Finisher to build the head slightly more and create a smooth and secure head. | |
|
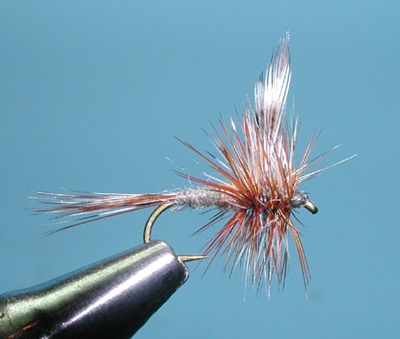
| 16. Apply a small amount of head finish and the Adams is completed. Note that the hackles are about 1 1/2 times the hook gap. Both the Tail and the Wing Tips are the same length as the hook shank. The hackles are spaced tightly both in front and behind the wing tips. The abdomen has a nice taper with some fibers protruding for movement. Finally, there is a clean thread head behnd the eye. |
|
©2023 Steve Schalla
This page is not to be copied without
my explicit permission.